Bulbs
Flower Basics
Flower Beds & Specialty Gardens
Flower Garden
Garden Furniture
Garden Gnomes
Garden Seeds
Garden Sheds
Garden Statues
Garden Tools & Supplies
Gardening Basics
Green & Organic
Groundcovers & Vines
Growing Annuals
Growing Basil
Growing Beans
Growing Berries
Growing Blueberries
Growing Cactus
Growing Corn
Growing Cotton
Growing Edibles
Growing Flowers
Growing Garlic
Growing Grapes
Growing Grass
Growing Herbs
Growing Jasmine
Growing Mint
Growing Mushrooms
Orchids
Growing Peanuts
Growing Perennials
Growing Plants
Growing Rosemary
Growing Roses
Growing Strawberries
Growing Sunflowers
Growing Thyme
Growing Tomatoes
Growing Tulips
Growing Vegetables
Herb Basics
Herb Garden
Indoor Growing
Landscaping Basics
Landscaping Patios
Landscaping Plants
Landscaping Shrubs
Landscaping Trees
Landscaping Walks & Pathways
Lawn Basics
Lawn Maintenance
Lawn Mowers
Lawn Ornaments
Lawn Planting
Lawn Tools
Outdoor Growing
Overall Landscape Planning
Pests, Weeds & Problems
Plant Basics
Rock Garden
Rose Garden
Shrubs
Soil
Specialty Gardens
Trees
Vegetable Garden
Yard Maintenance
How to Build a Wooden Wheelbarrow Flower Cart
How to Build a Wooden Wheelbarrow Flower Cart. A wooden wheelbarrow hearkens back to the old world method of hauling items to and from a garden. While most contemporary gardeners have more efficient means of transporting gardening materials, an old-fashioned wooden wheelbarrow makes an ornamental addition to a landscape. Make your own wheelbarrow...
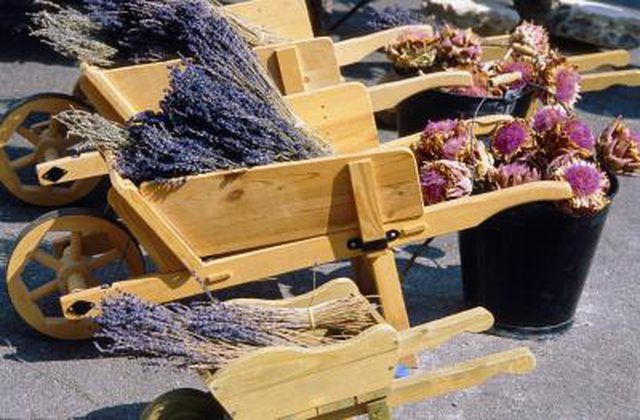
A wooden wheelbarrow hearkens back to the old world method of hauling items to and from a garden. While most contemporary gardeners have more efficient means of transporting gardening materials, an old-fashioned wooden wheelbarrow makes an ornamental addition to a landscape. Make your own wheelbarrow to use as a planter and give your garden a unique and rustic look. You can build your own for pennies on the dollar compared to what you can buy one for from a garden center.
Things You'll Need
Sheet of plywood
Measuring tape
String
Saw
2-by-2 studs (2)
Drill
6-inch galvanized bolt
2-1/2 inch screws
Screwdriver
Sandpaper
Wood stain or paint
Paintbrush
Draw a circle on a sheet of plywood -- place the circle in a corner so you can use the rest of the plywood for the bucket frame. If you don't have a template, tie a string around a pencil and hold the string end one-half the desired diameter for the wheel. A 3-inch radius means the wheel will be 6 inches in diameter. Hold the string in place at the center and move the pencil in a circle around the center point.
Measure the bucket floor and side panels. The floor could be 12 inches long and 8 inches wide, and the two side panels would be 12 inches long and 5 inches high. For this example, the front and back panels would be 8 inches wide and 5 inches tall to hold the plant soil.
Cut the drawn shapes out of the plywood with a saw.
Drill three holes along each side edge of the bucket bottom, approximately 1/2-inch from the edge. The side panel will be flush with the edge of the bucket floor. Drill two holes on the front and back edge of the bucket floor for those panels.
Screw the side panels in place with 2-1/2 inch screws, keeping them flush with the bucket floor. Drill a hole from the front panel into the side panel edge then screw it in place. Repeat for the back panel.
Cut two 2-by-2 studs 30 inches in length.
Turn the bucket over and line up the studs along the bottom. The back ends should extend past the rear of the bucket along the outside edge approximately 10 inches. The studs should come together in front of the bucket, forming a triangle with just enough room for the wheel to sit between it. Drill holes along the studs then secure them in place with screws into the bucket floor.
Drill a hole through the front 2-by-2 studs in line with the wheel. Secure the wheel in place with a 6-inch galvanized bolt.
Cut the remaining 2-by-2 stud pieces into posts approximately 6 inches high. Place the posts at the back of the bucket so the wheelbarrow stands at an angle down to the front wheel. Secure the posts to the bucket floor by driving a screw into place.
Sand down all rough edges on the wheelbarrow.
Tips & Warnings
Sealing the wheelbarrow isn't necessary if it will be used as a planter and needs water to drain out of it. Otherwise, stain or paint the wheelbarrow to match your garden landscape or leave it with a raw wood look.


