Bulbs
Flower Basics
Flower Beds & Specialty Gardens
Flower Garden
Garden Furniture
Garden Gnomes
Garden Seeds
Garden Sheds
Garden Statues
Garden Tools & Supplies
Gardening Basics
Green & Organic
Groundcovers & Vines
Growing Annuals
Growing Basil
Growing Beans
Growing Berries
Growing Blueberries
Growing Cactus
Growing Corn
Growing Cotton
Growing Edibles
Growing Flowers
Growing Garlic
Growing Grapes
Growing Grass
Growing Herbs
Growing Jasmine
Growing Mint
Growing Mushrooms
Orchids
Growing Peanuts
Growing Perennials
Growing Plants
Growing Rosemary
Growing Roses
Growing Strawberries
Growing Sunflowers
Growing Thyme
Growing Tomatoes
Growing Tulips
Growing Vegetables
Herb Basics
Herb Garden
Indoor Growing
Landscaping Basics
Landscaping Patios
Landscaping Plants
Landscaping Shrubs
Landscaping Trees
Landscaping Walks & Pathways
Lawn Basics
Lawn Maintenance
Lawn Mowers
Lawn Ornaments
Lawn Planting
Lawn Tools
Outdoor Growing
Overall Landscape Planning
Pests, Weeds & Problems
Plant Basics
Rock Garden
Rose Garden
Shrubs
Soil
Specialty Gardens
Trees
Vegetable Garden
Yard Maintenance
How to build a Brick/Concrete Koi Pond
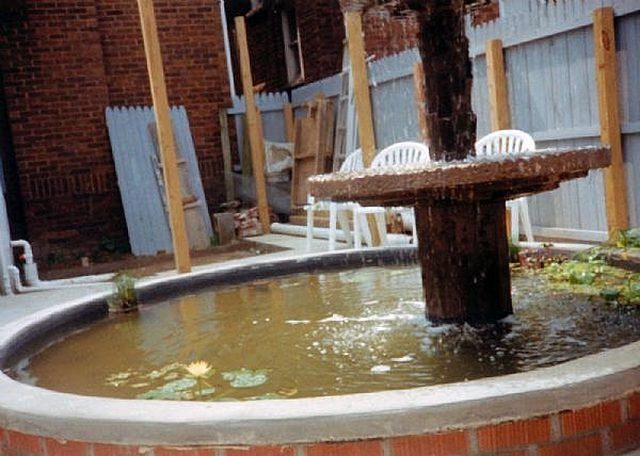
How to build a Brick/Concrete Koi Pond. Koi are voracious eaters, and can grow to be 10lbs. in two seasons. I built this ~10ft. round Pond for 5 Koi, and within 3 years I had Koi to give away. Koi love shade, and a submersed plastic end-table with the legs cut down to 6in. will give them a place to rest, while providing plenty of water overhead to...
Koi are voracious eaters, and can grow to be 10lbs. in two seasons. I built this ~10ft. round Pond for 5 Koi, and within 3 years I had Koi to give away. Koi love shade, and a submersed plastic end-table with the legs cut down to 6in. will give them a place to rest, while providing plenty of water overhead to swim.
Things You'll Need
Bricks
1/8" wall paneling, or masonite to form the cement
Redy-mix sacks of cement
2x2s for form supports
tar, or silicone rubber for joint sealer
Trowel & joint strike
stiff brush or cut-off broom-head
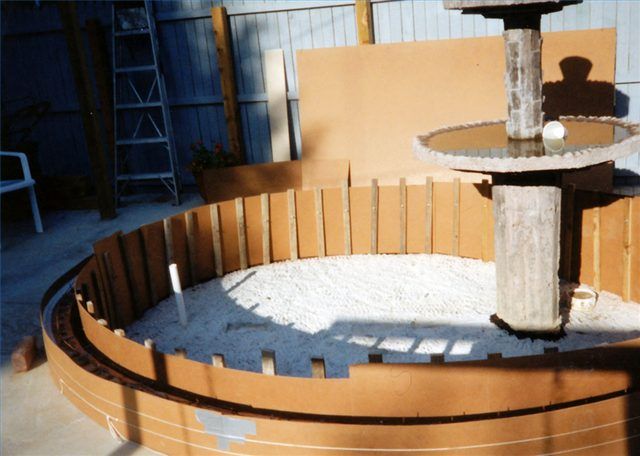
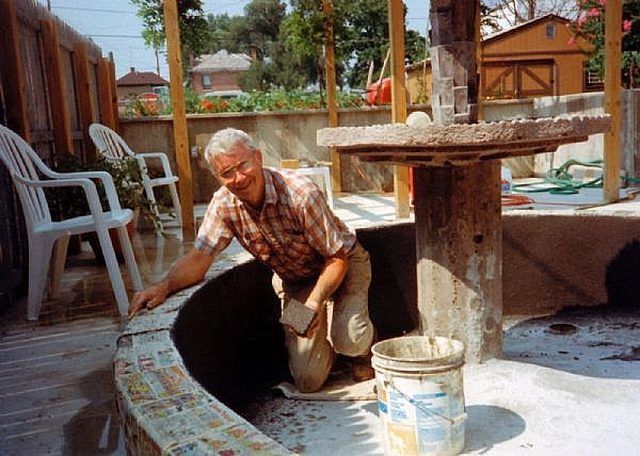
FOUNDATION: In places where the winter frost penetrates the ground, and you are building a HOUSE, you need to have a foundation for it that extends below the frost-line. That way, the ground may expand and contract against the exterior walls without damaging the house. THIS IS NOT A HOUSE! ! ! Its OK that your Pond rises and falls with the Patio. In the first picture you will notice I tarred my Fountain. Its foundation goes below the frost-line, and the frozen pond needs to slide up & down the base column of the Fountain.
Dig a foundation suitable to lay your brick pond-wall to. It doesn't have to be deep or thick - perhaps 8in. wide, and 4 - 6in. deep. You don't even need forms...just dig and pour. "But" you do need to level it.
Lay-up your wall, striking the joints on the face-side, but leaving the side facing to Pond rough. You will be pouring Cement against it, and the Cement/Brick should bond.
You are going to need to reinforce the Pond Walls against freezing and break-up. Of course, the best treatment for that is to place a few clear 2-liter bottles in the Pond (with a cupful of water, and capped)so that the Cap faces down. The Fish are going to need that for light in the winter too.
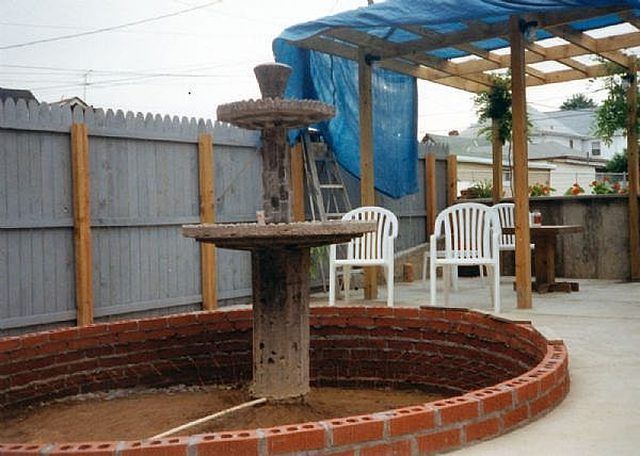
I drove some 1/2" re-bars into the ground, and tied 3 courses of 1/2" bars to them, evenly spaced, around the pond.
Mix & Place cement an "rod" it - use a stick, poking the cement down to fill every nook & cranny. When the cement stops sinking, you probably have rodded it enough. Trowel the cement off even with the top of the Bricks. You should let the cement cure for at least 3 days before stripping the forms off.
Having a rough top, you may lay brick as I show in the photo above, mortar between them, and strike the joints...if you want as Brick Top for your Pond. I went a step farther and Formed & Poured a Concrete Cap for mine. It's "fielder's choice."
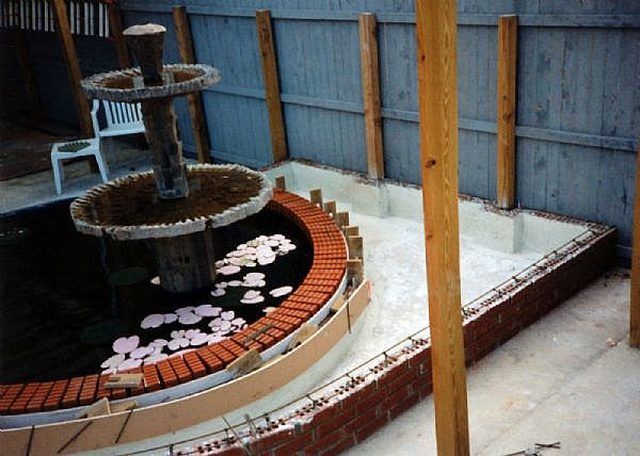
The last step is to place Cement in the bottom, and trowel it. Make sure all of it slopes to the drain. Personally, I ran a 2in. PVC drain flowing by gravity into a Tank in my Basement. I filtered the water, and my Sump Pump in the Tank recirculated the water to my fountain. I tee'd the line, and with valves, was able to drain the Pond to the City's Storm Drain from my Basement. Other means of recirculating the water can be found by visiting Plumbing supply Stores, magazines, or on-line.
Tips & Warnings
Even having a drain & recirculation system won't relieve you of the need to periodically suction all the scrap off the bottom of the pool. Fish don't like to swim in their own waste.
Be sure to buy water-lilies. We bought water Hyacinth too, but you have to thin it frequently. Hyacinth makes good fertilizer for your garden if you compost it.
You can build too small, but not too big. Don't skimp! And don't forget to provide shade for the fish.


