Bulbs
Flower Basics
Flower Beds & Specialty Gardens
Flower Garden
Garden Furniture
Garden Gnomes
Garden Seeds
Garden Sheds
Garden Statues
Garden Tools & Supplies
Gardening Basics
Green & Organic
Groundcovers & Vines
Growing Annuals
Growing Basil
Growing Beans
Growing Berries
Growing Blueberries
Growing Cactus
Growing Corn
Growing Cotton
Growing Edibles
Growing Flowers
Growing Garlic
Growing Grapes
Growing Grass
Growing Herbs
Growing Jasmine
Growing Mint
Growing Mushrooms
Orchids
Growing Peanuts
Growing Perennials
Growing Plants
Growing Rosemary
Growing Roses
Growing Strawberries
Growing Sunflowers
Growing Thyme
Growing Tomatoes
Growing Tulips
Growing Vegetables
Herb Basics
Herb Garden
Indoor Growing
Landscaping Basics
Landscaping Patios
Landscaping Plants
Landscaping Shrubs
Landscaping Trees
Landscaping Walks & Pathways
Lawn Basics
Lawn Maintenance
Lawn Mowers
Lawn Ornaments
Lawn Planting
Lawn Tools
Outdoor Growing
Overall Landscape Planning
Pests, Weeds & Problems
Plant Basics
Rock Garden
Rose Garden
Shrubs
Soil
Specialty Gardens
Trees
Vegetable Garden
Yard Maintenance
How to Build a Plant Propagation Mist System
How to Build a Plant Propagation Mist System. One way you can assure success when propagating plant seeds or cuttings is to make sure the rooting medium stays moist without becoming too wet. The best way to do this is to use a plant propagation mist system. You can buy all the components needed to assemble your system in most home stores, garden...
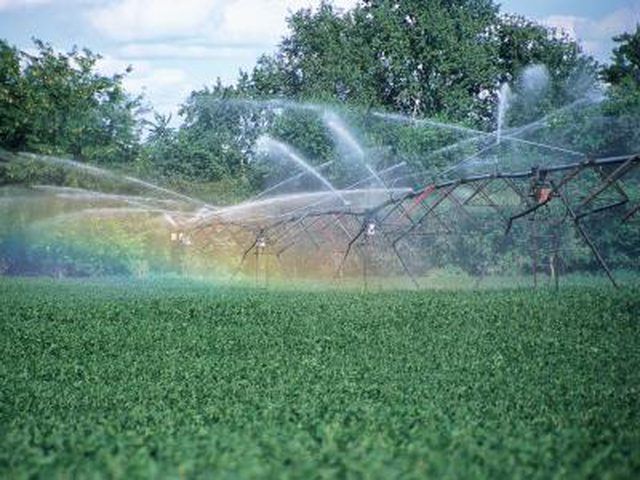
One way you can assure success when propagating plant seeds or cuttings is to make sure the rooting medium stays moist without becoming too wet. The best way to do this is to use a plant propagation mist system. You can buy all the components needed to assemble your system in most home stores, garden centers, hardware stores or on the Internet. Putting together a plant propagation mist system is much like putting together pieces in a Lego set. It is easy to design and assemble.
Things You'll Need
Flexible tubing
Misters
Connectors
Hangers, twist ties or wire
Sketch out how your seed or cutting trays will lay out on your tables or benches. This way you will be able to plan where to hang your flexible tubing and calculate the distance the misting nozzles will be from the trays for the most efficient coverage.
Decide where and how you will set up the tubing that will carry water to the misters. For example, if you are setting up a propagation mist system in a greenhouse you can plan on clipping the tubing along any lateral supports that run along the back of your planting tables.
Calculate how many feet of tubing you need to cover the square footage of the propagation material surface area. You will need to make sure a single line can space misters at least 18 inches apart with sufficient water pressure to spray over any propagation trays fully.
Buy your tubing in rolls of 25, 50 or 100 feet. Using your measurements, you can also figure out how many misting heads, connectors, ells for right angles and end pieces you will need.
Screw the top of your tubing with the attached connecting head directly onto your spigot or water source if you only want to use the system manually. A better choice is to insert a timer onto the spigot and screw the tubing to the outlet of the timer. This way you will leave the water source on and the timer will turn the misting system on and off according to the schedule you set on the timer.
Run the tubing line from the water source (and timer) to where your first mist head needs to go. Cut the tubing completely at this point.
Push one end of the coupler (the mister comes screwed onto a slip-on coupler) onto your cut line with the mister facing outward so it will spray across the planting area.
Slide on another length of tubing to the open end of the coupler. Continue to slip lengths of tubing into misters/couplers then couplers back into tubing until the full length of your line is completed.
Use right-angled ell pieces if you need to turn sharp corners. These ells are pushed onto either end of the tubing just the same as the mist couplers.
Slide on an end cap when you reach the end of the tubing line so the water remains contained in the system. Some end caps take the form of clips. With this design you slide the clip on the end of the tube, fold the very end of the tube back on itself and pull down the clip so it holds the folded tube closed.
Use clips, wire or twist ties to connect your plant propagation mist system to existing supports or railings near your plant trays.
Tips & Warnings
If you are planning on building a large plant propagation system, make sure you have sufficient water pressure to provide spray coverage to the misters at the end of the line.


