Bulbs
Flower Basics
Flower Beds & Specialty Gardens
Flower Garden
Garden Furniture
Garden Gnomes
Garden Seeds
Garden Sheds
Garden Statues
Garden Tools & Supplies
Gardening Basics
Green & Organic
Groundcovers & Vines
Growing Annuals
Growing Basil
Growing Beans
Growing Berries
Growing Blueberries
Growing Cactus
Growing Corn
Growing Cotton
Growing Edibles
Growing Flowers
Growing Garlic
Growing Grapes
Growing Grass
Growing Herbs
Growing Jasmine
Growing Mint
Growing Mushrooms
Orchids
Growing Peanuts
Growing Perennials
Growing Plants
Growing Rosemary
Growing Roses
Growing Strawberries
Growing Sunflowers
Growing Thyme
Growing Tomatoes
Growing Tulips
Growing Vegetables
Herb Basics
Herb Garden
Indoor Growing
Landscaping Basics
Landscaping Patios
Landscaping Plants
Landscaping Shrubs
Landscaping Trees
Landscaping Walks & Pathways
Lawn Basics
Lawn Maintenance
Lawn Mowers
Lawn Ornaments
Lawn Planting
Lawn Tools
Outdoor Growing
Overall Landscape Planning
Pests, Weeds & Problems
Plant Basics
Rock Garden
Rose Garden
Shrubs
Soil
Specialty Gardens
Trees
Vegetable Garden
Yard Maintenance
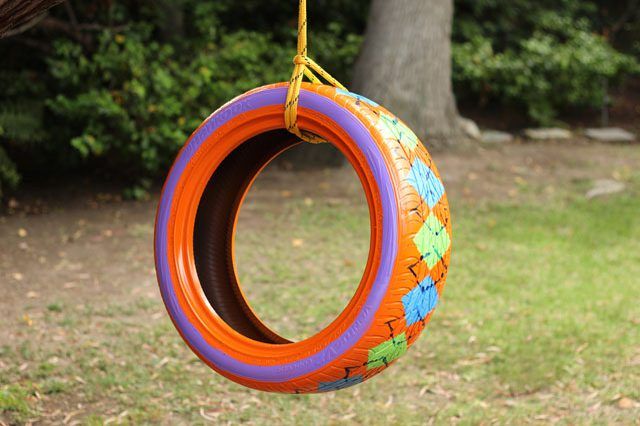
How to Paint a Rubber Tire
Upcycling old rubber tires is a great way to keep them out of landfills. And they're easy to paint with bright colors and fun patterns.
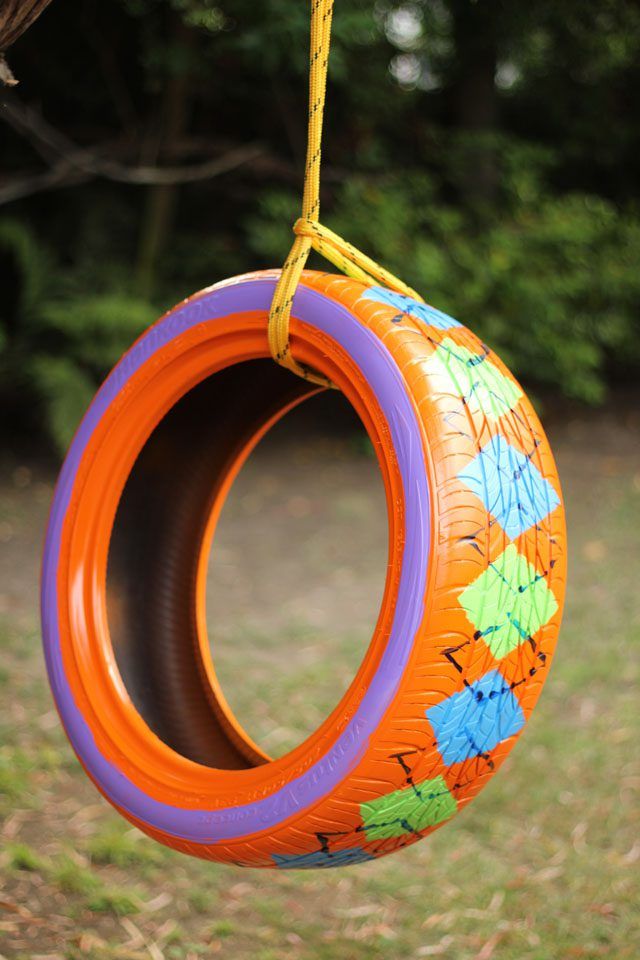
Upcycling old rubber tires is a great way to keep them out of landfills. Painted with bright colors and fun patterns, they can become vibrant lawn art, outdoor planters or the ultimate tree swing. And painting rubber tires is a lot easier than you would think.
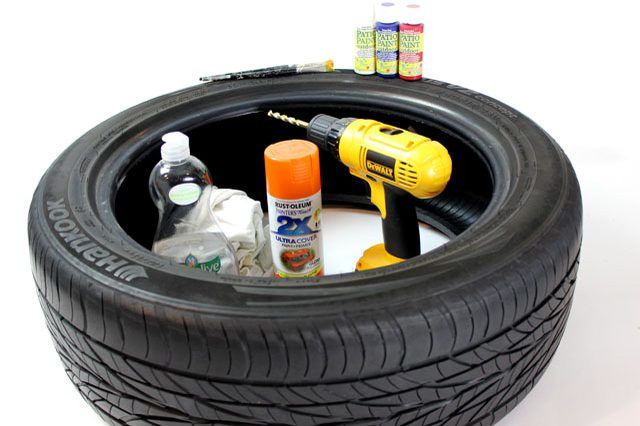
Things You'll Need
Rubber tire
Rag
Dishwashing soap
Drill
Spray paint for outdoor use (preferably with primer)
Contact paper
Acrylic paint for outdoor use
Paintbrushes
Step 1: Clean the Tire
Using a rag and dishwashing soap, thoroughly wash the tire inside and out to remove dirt and grease. Be sure to work the rag into the treads of the tire. Rinse thoroughly, and let the tire dry overnight.
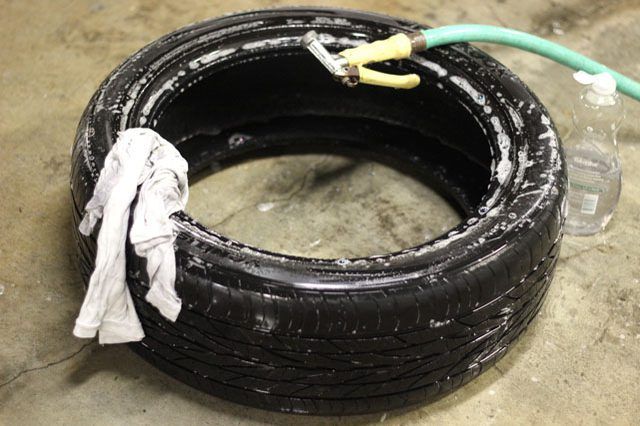
Tip
When the tire is dry, there may still be a little water trapped on the inside of the tire. Just wipe it away with a paper towel.
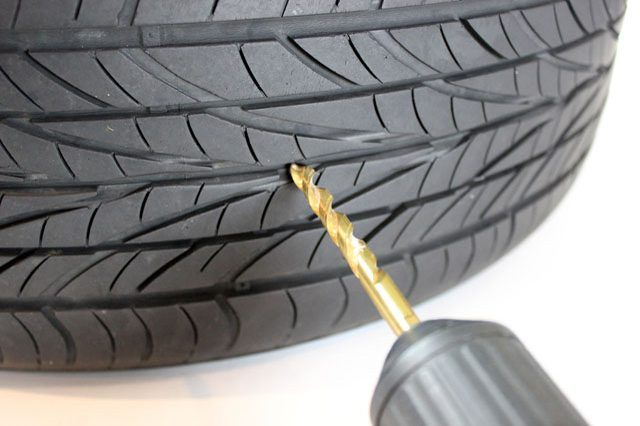
Step 2: Drill Drainage Holes
If you are planning on using the rubber tire as a swing, drill one to three holes in what will be the bottom using a large drill bit (at least 3/8-inch). The drainage holes will prevent water from accumulating in the tire so insects stay away.
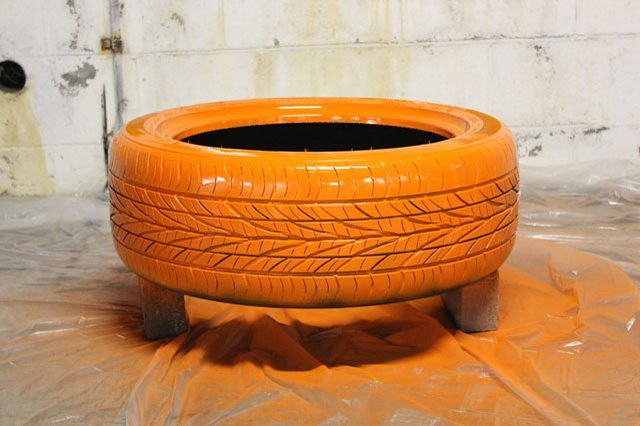
Step 3: Spray Paint the Tire
In a well-ventilated space, paint the tire using spray paint that is designed for both indoor and outdoor use. Check the label to make sure it is suitable for plastic. Most spray paints available in the store are a combination paint plus primer, so you do not need to apply a primer first if your spray paint already includes it. Apply several coats until the paint has completely covered the tire. Because the tire is black, it can take a lot of coats for lighter colors to become opaque. It took two and a half cans of orange paint to cover this tire.
Tip
Prop the tire on two bricks so the tire does not sit on the ground as you spray paint. This way, the paint will not stick to any paper or plastic protection you've placed under the tire. When the top side is dry, flip the tire over and paint the other side.
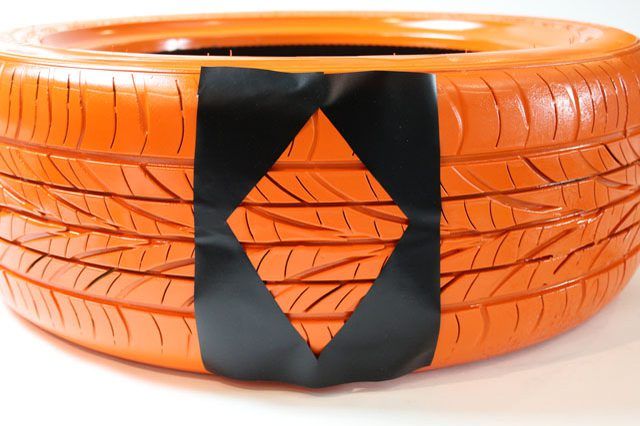
Step 4: Create Stencils for Details
To paint designs on the tire, you can draw freehand, but it can also be easier if you create stencils first. Because I was creating an argyle pattern on this tire, I cut out diamond shapes on contact paper to make an adhesive-backed stencil that would stay on the tire as I painted. If you are using different colors, create a stencil for each color so the paint colors don't mix.
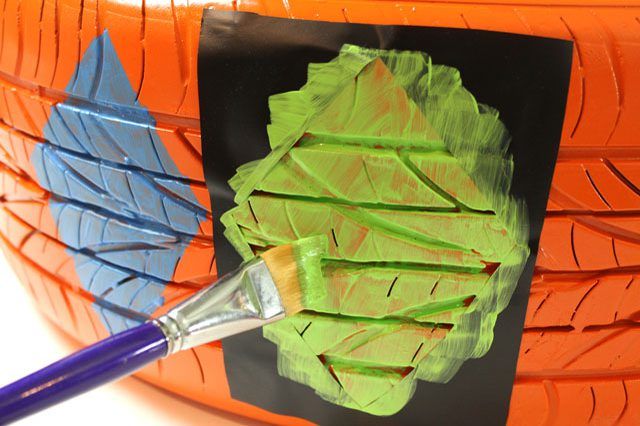
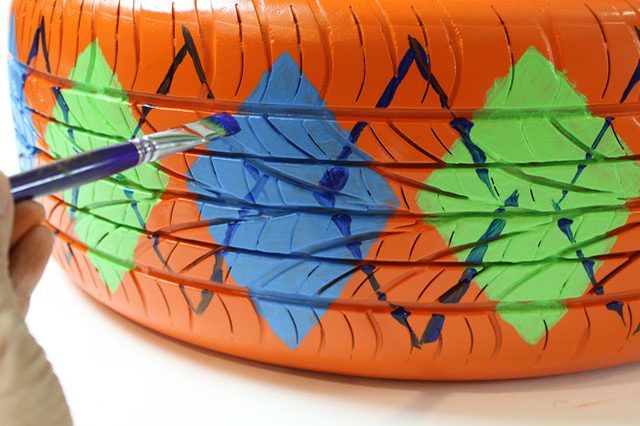
Step 5: Paint the Details
For the design details, use acrylic paint that is designed for outdoor use so it will withstand the elements. I actually used an outdoor acrylic paint meant to go on terra cotta pots. In fact, at my local crafts store, it is stocked by the pots rather than with the other paints. (You can also use outdoor latex paint.) Using the stencil, move the paintbrush from the outside in so paint does not leak under the stencil. And be sure to get the brush into the treads of the tire for maximum paint coverage.
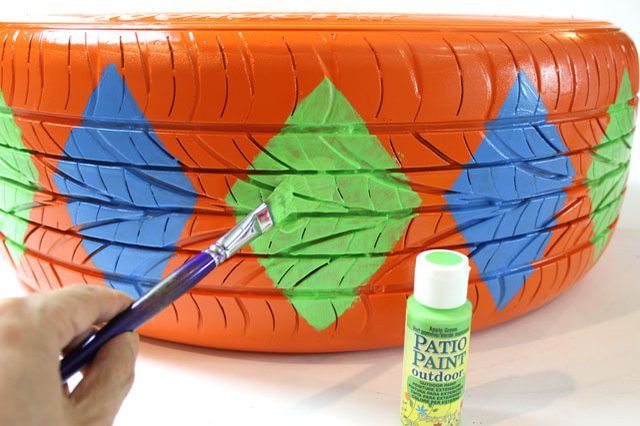
Step 6: Apply Additional Coats
Paint one or two additional coats of your design to make it opaque. If you've already removed the stencils, that's fine, since you can use the first coat as your guide.
Step 7: Draw Finishing Details
To complete the argyle design, I drew diamond shapes freehand. For your own design, you might draw polka dots, hearts, smiley faces or anything you can imagine.
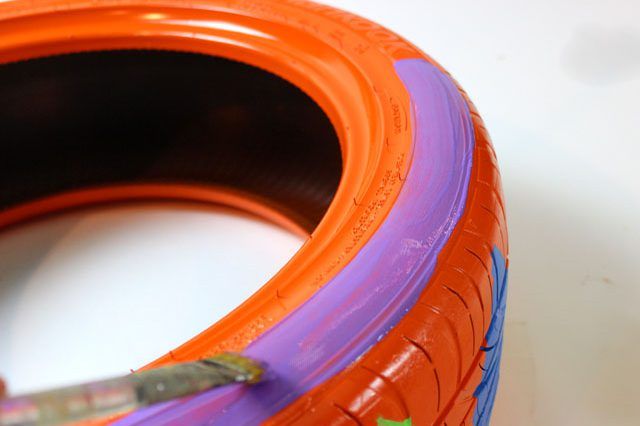
Step 8: Don't Forget the Tire Walls
After painting the main section of the tire where the treads are, add a design element to the walls of the tire. It can be as simple as a circle around the tire that mimics the tire's grooves.
Step 9: Make a Tire Swing
When your tire is painted, display it as a swing that hangs from a tree branch. Think safety first by using a rope that is rated for a high weight level, and make sure that the branch is thick and sturdy enough to hold the weight of someone swinging from it (because you know you're going to be the first one on there!).


