Bulbs
Flower Basics
Flower Beds & Specialty Gardens
Flower Garden
Garden Furniture
Garden Gnomes
Garden Seeds
Garden Sheds
Garden Statues
Garden Tools & Supplies
Gardening Basics
Green & Organic
Groundcovers & Vines
Growing Annuals
Growing Basil
Growing Beans
Growing Berries
Growing Blueberries
Growing Cactus
Growing Corn
Growing Cotton
Growing Edibles
Growing Flowers
Growing Garlic
Growing Grapes
Growing Grass
Growing Herbs
Growing Jasmine
Growing Mint
Growing Mushrooms
Orchids
Growing Peanuts
Growing Perennials
Growing Plants
Growing Rosemary
Growing Roses
Growing Strawberries
Growing Sunflowers
Growing Thyme
Growing Tomatoes
Growing Tulips
Growing Vegetables
Herb Basics
Herb Garden
Indoor Growing
Landscaping Basics
Landscaping Patios
Landscaping Plants
Landscaping Shrubs
Landscaping Trees
Landscaping Walks & Pathways
Lawn Basics
Lawn Maintenance
Lawn Mowers
Lawn Ornaments
Lawn Planting
Lawn Tools
Outdoor Growing
Overall Landscape Planning
Pests, Weeds & Problems
Plant Basics
Rock Garden
Rose Garden
Shrubs
Soil
Specialty Gardens
Trees
Vegetable Garden
Yard Maintenance
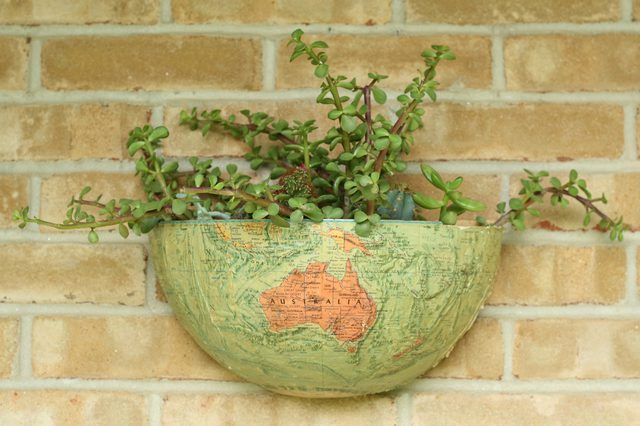
How to Make a Succulent Wall Hanging
Learn how to make a vintage globe into a succulent wall planter, perfect to hang on a covered porch or indoors.
Succulents are by far the lowest maintenance plant around, which makes them useful for any homeowners wanting to bring in some greenery, even those "black thumb" types. Because of their low need for water, they can be potted in planters without drainage holes. When cut into quarters, a vintage cardboard globe can be made into a quirky wall-hanging planter to house succulents.
Things You'll Need
Vintage cardboard globe
Box cutter
Medium-density fiberboard (MDF)
Jigsaw
D-ring or sawtooth hanger and nails or screws to attach
Tape measure
Screwdriver or hammer to attach hanging hardware
Hot glue gun
Plastic sheeting or plastic bag
Potting soil
Protective gloves�
Step 1: Cut the Globe in Half
To begin, use a box cutter to create an opening along the equator of your globe. This hole needs to be big enough for your jigsaw blade to slide into.

Tip
A vintage globe that has some damage but still has a quarter or more that can be salvaged will work for this project. This particular globe was missing its stand.
After you have your hole for the jigsaw, slide the blade in without turning on the saw.
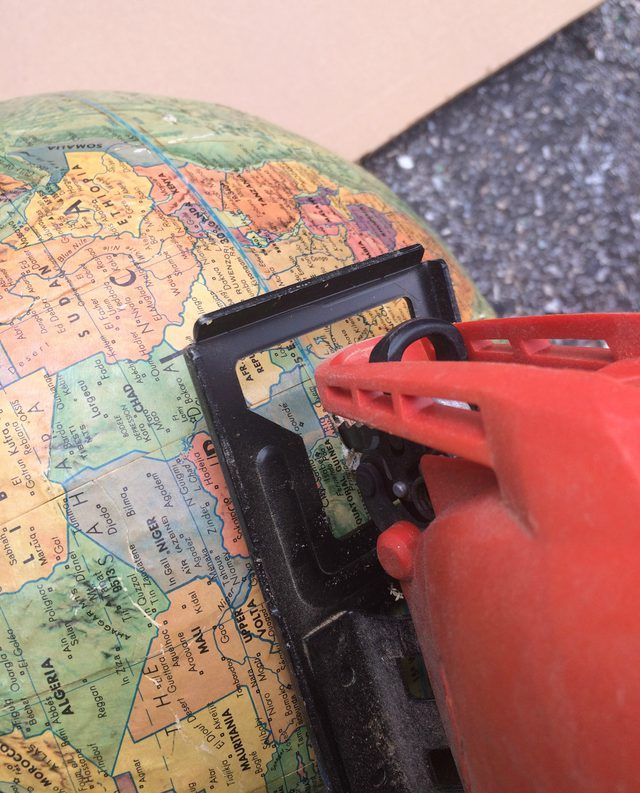
Pull the trigger and use the jigsaw to cut along the equator.
Warning
The globe is round and will not be stable. Use caution and care when cutting.
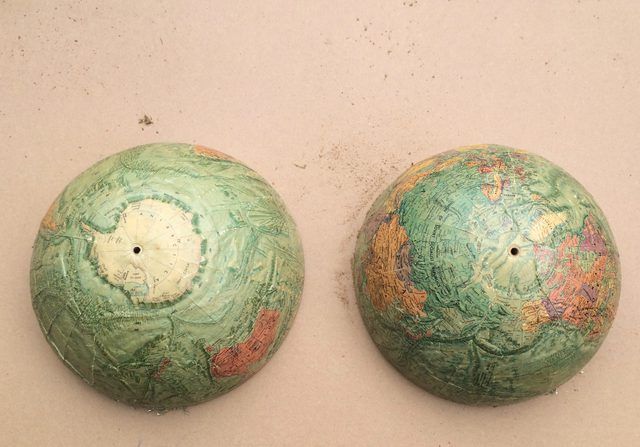
Step 2: Cut the Halves in Half
Cut each half in half again, creating four quarters. You can choose any latitudinal line as a guide to cut the upper and lower hemispheres. If your globe does not have latitudinal markings, use a pencil to mark the hemisphere into two halves. Carefully cut with the jigsaw.
Step 3: Cut Out the Backing
Lay the quarters down on the MDF (medium density fiberboard). Use a pencil to trace the curved outline of the quarter.
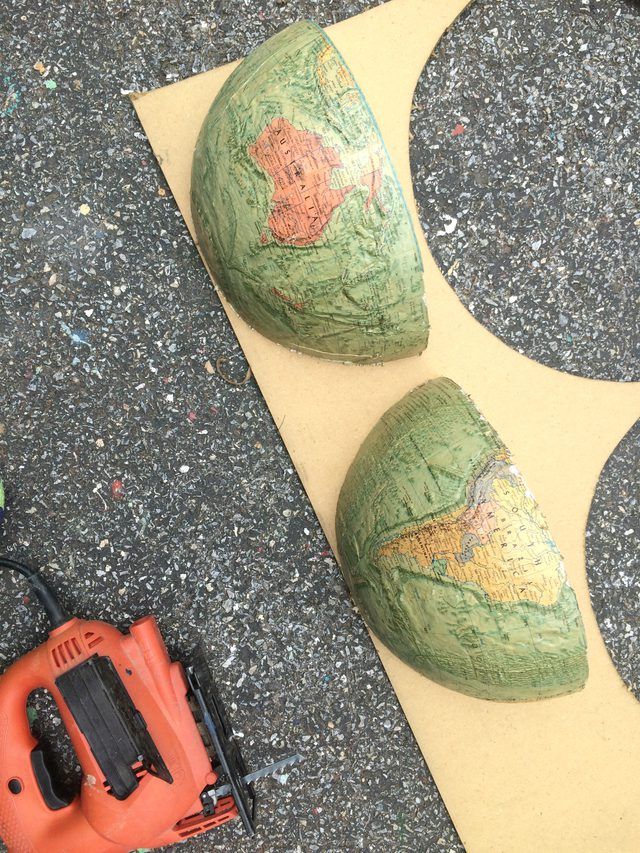
After you have traced the outline of the curved section, use a ruler to create a line from end point to end point so that you have drawn a closed semicircle.
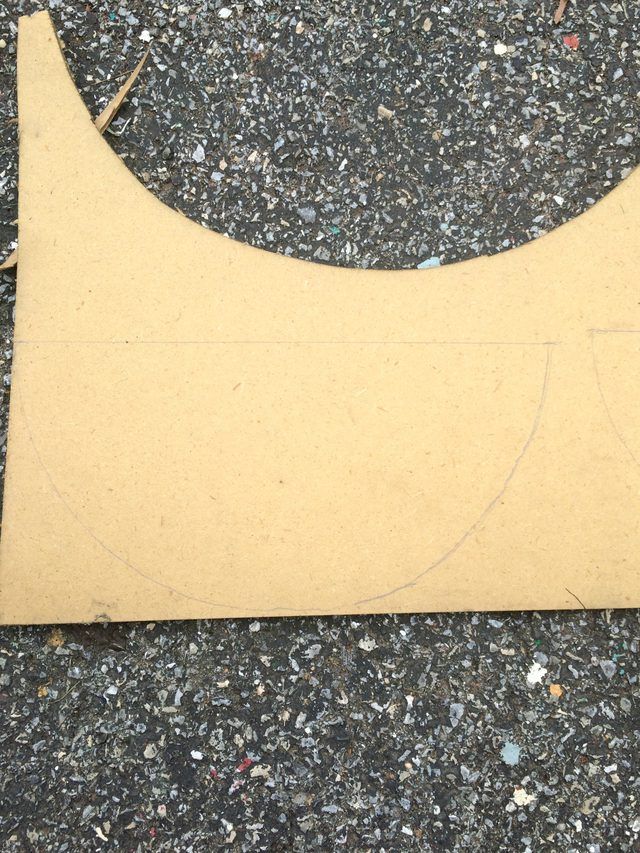
Use the jigsaw to cut along the line you have drawn.
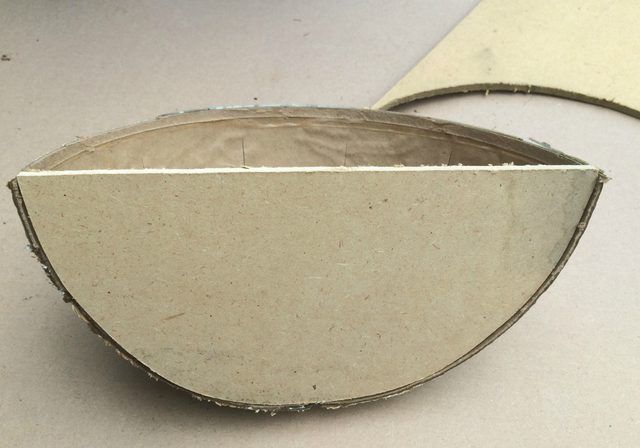
Tip
Prior to gluing, test your backing and make sure it fits snugly into the quarter of your globe.
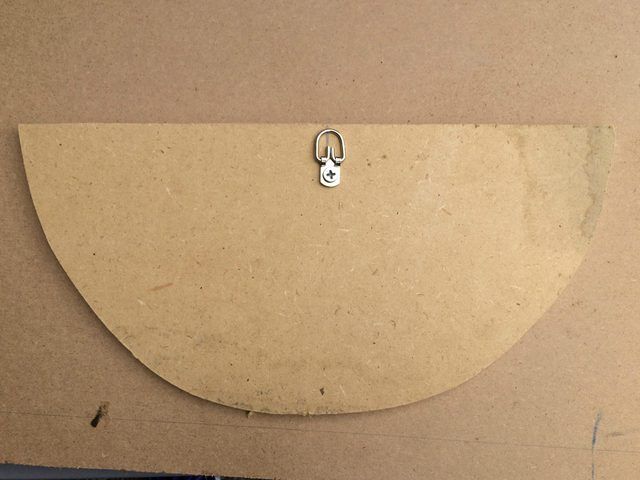
Step 4: Add Hanging Hardware
Before you glue your backing on, attach your hanging hardware. It's important to do this before you glue your backing to your globe. After you glue, the globe surface will be round and roll while you try to attach the hardware.
Find the center of the straight edge and measure 1 inch down and make a pencil mark. Center the hardware and secure in place.
Step 5: Glue the Backing in Place
Using a hot glue gun, run glue along the circular edge of the globe.
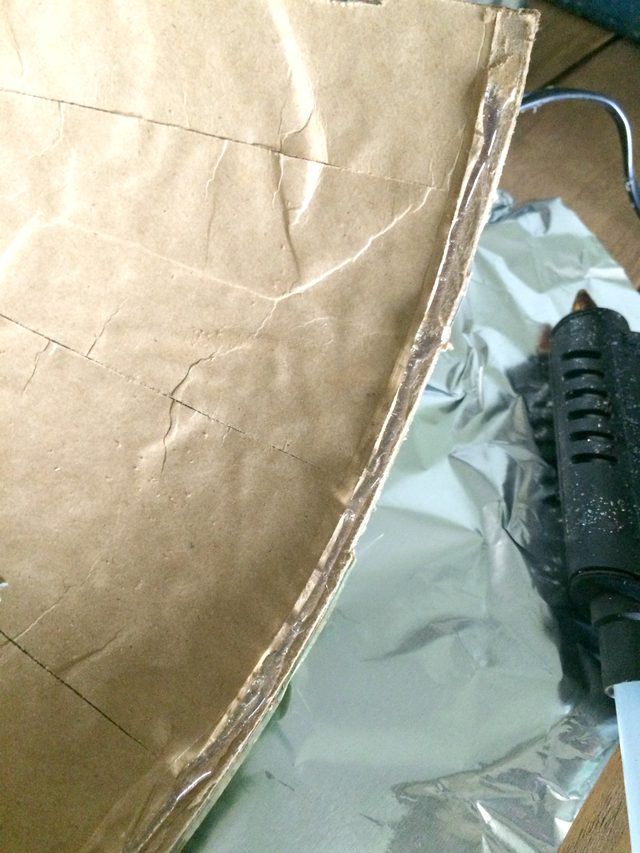
Work quickly, as the glue will dry fast. Place the backing in place. Hold it in position until the glue sets, which will be less than a minute.
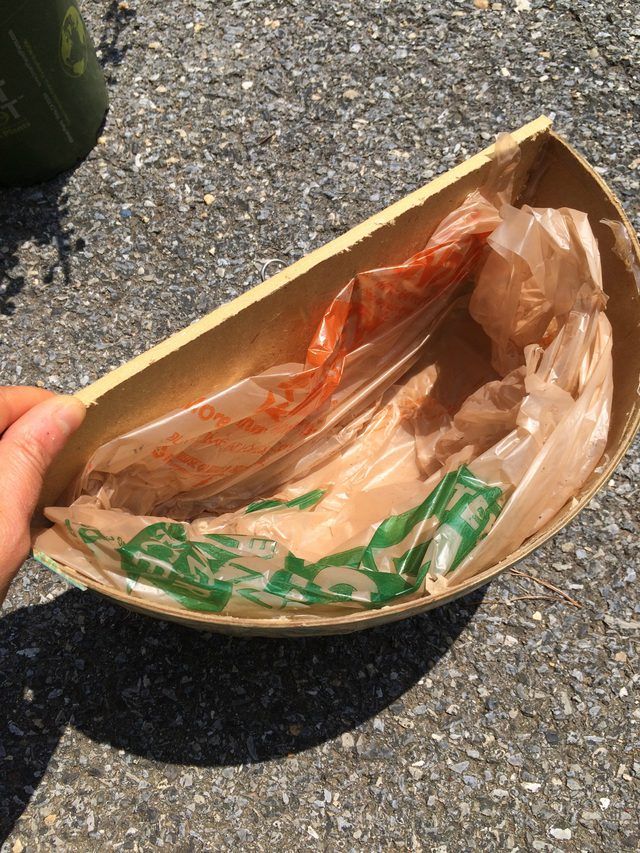
Step 6: Line the Globe Planter
Use plastic sheeting or a plastic bag to line the globe planter. This step will protect the cardboard globe and MDF from moisture.
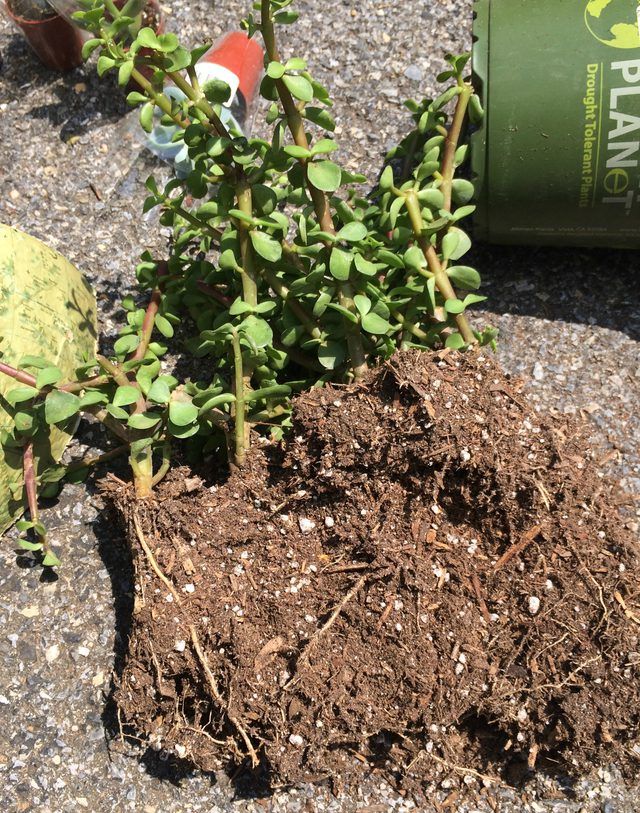
Step 7: Fill With Succulents and Soil
Gather your succulents and potting soil. You can purchase small plants and arrange how you'd like, or you can purchase larger plants and separate them into smaller sections.
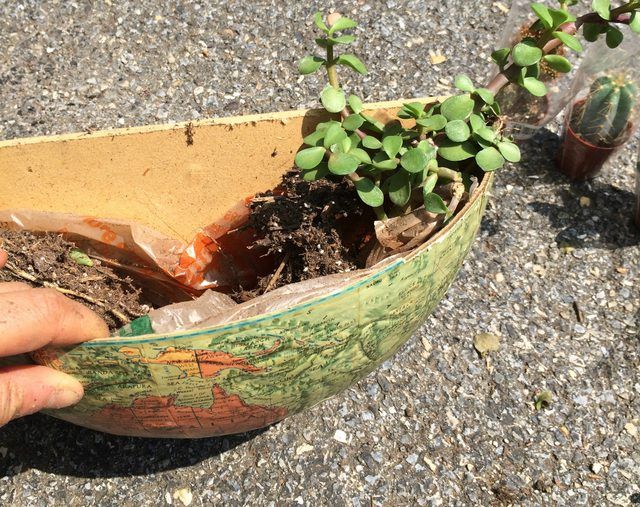
Fill the bottom of your planter about one quarter of the way up with potting soil. Arrange the plants as you'd like, and then fill in with more potting soil. If you are planting cacti, wear protective gloves.
After you have planted your plants, you are ready to hang the planter on the wall in your home or on a covered porch.
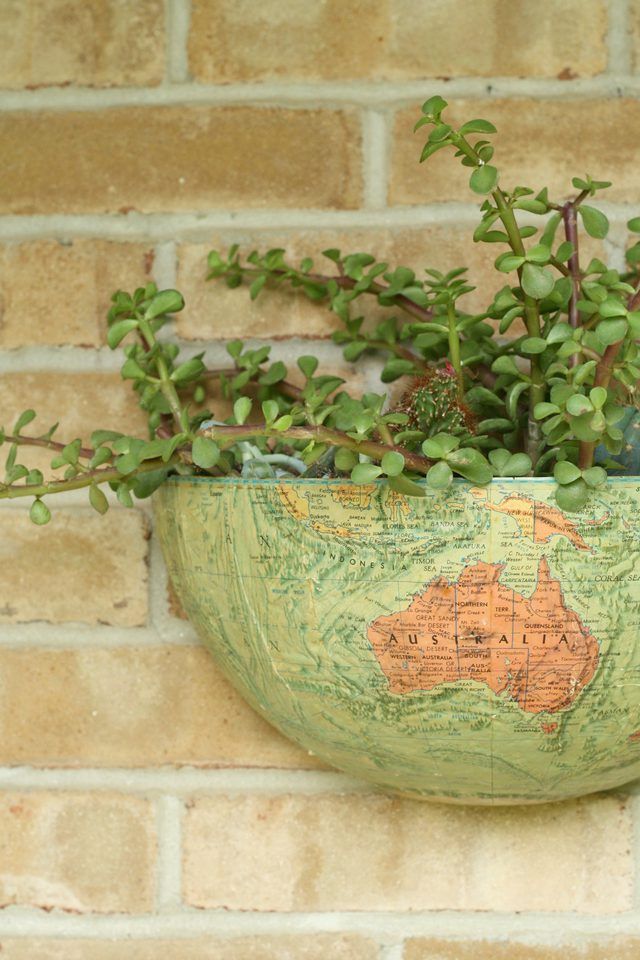
After you hang it, maintenance is simple. Because succulents do not require much water, you can water only when the soil feels dry to the touch by pouring a bit directly into the planter. You can also use a spray bottle to spritz the soil and plants. This low-maintenance planter will bring life and interest to your wall for years to come.


