Bulbs
Flower Basics
Flower Beds & Specialty Gardens
Flower Garden
Garden Furniture
Garden Gnomes
Garden Seeds
Garden Sheds
Garden Statues
Garden Tools & Supplies
Gardening Basics
Green & Organic
Groundcovers & Vines
Growing Annuals
Growing Basil
Growing Beans
Growing Berries
Growing Blueberries
Growing Cactus
Growing Corn
Growing Cotton
Growing Edibles
Growing Flowers
Growing Garlic
Growing Grapes
Growing Grass
Growing Herbs
Growing Jasmine
Growing Mint
Growing Mushrooms
Orchids
Growing Peanuts
Growing Perennials
Growing Plants
Growing Rosemary
Growing Roses
Growing Strawberries
Growing Sunflowers
Growing Thyme
Growing Tomatoes
Growing Tulips
Growing Vegetables
Herb Basics
Herb Garden
Indoor Growing
Landscaping Basics
Landscaping Patios
Landscaping Plants
Landscaping Shrubs
Landscaping Trees
Landscaping Walks & Pathways
Lawn Basics
Lawn Maintenance
Lawn Mowers
Lawn Ornaments
Lawn Planting
Lawn Tools
Outdoor Growing
Overall Landscape Planning
Pests, Weeds & Problems
Plant Basics
Rock Garden
Rose Garden
Shrubs
Soil
Specialty Gardens
Trees
Vegetable Garden
Yard Maintenance
How to Force Spring Bulbs Indoors
How to Force Spring Bulbs Indoors. One of most refreshing sights to see in the depths of winter is a container of spring bulbs like tulips, crocus or daffodils in your home. By forcing spring bulbs, manipulating them in planted containers and exposing them to their necessary cold dormancy, you can trick them into growing in your home as if it were...
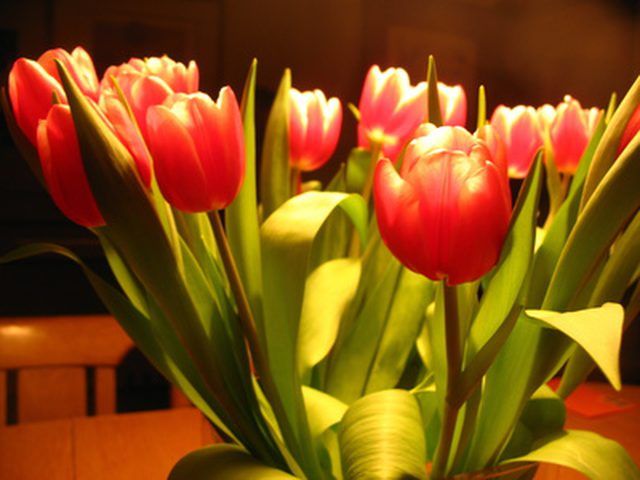
One of most refreshing sights to see in the depths of winter is a container of spring bulbs like tulips, crocus or daffodils in your home. By forcing spring bulbs, manipulating them in planted containers and exposing them to their necessary cold dormancy, you can trick them into growing in your home as if it were already springtime. Purchase your bulbs in early autumn and immediately plant in containers and expose them to cold so that by midwinter you can watch the emerging flowers grow and bloom on your living room windowsill.
Things You'll Need
6-inch plastic growing container
Potting soil
Spring flower bulbs
Refrigerator
Fill your 6-inch plastic container with potting soil about 40 to 50 percent full. Make sure you have a container with bottom drainage holes. Alternatively, if you have lots of bulbs or large-sized bulbs, you may want to use a larger container that is 8, 10, or 12 inches in diameter.
Place your spring bulbs, pointy side up, in the container by gently nestling them into the soil. Place the bulbs close together with no more than 1 inch between them.
Scatter more potting soil atop the bulbs so that their pointed tips are no more than 1 to 2 inches below the soil's surface. Large bulbs like hyacinth, daffodil and tulips can be planted with as much as 5 inches of soil above them, but tiny bulbs like crocus, grape hyacinths, snowdrops or dwarf irises must not be any deeper than 2 inches.
Water the container to thoroughly moisten the soil and bulbs. Allow water to fully drain out the bottom holes. Watering is made easier if the soil line in Step 3 is 1/2 to 3/4 inch below the rim of the container to catch the water and prevent soil from washing off when you pour the water on.
Place the planted container in a cool, dry location where the temperature is between 35 and 45 degrees F for a duration of 14 to 15 weeks. Choose a spare refrigerator, or perhaps a dark corner of an unheated garage will suffice. Make sure the container will not be exposed to temperatures below 30 degrees F so the bulbs' roots or bodies will not be frozen over the course of the chilling treatment.
Monitor the containers every seven to 10 days, touching the soil surface with your finger. Water the pots to keep them moist but never soggy. Feel free to remove the containers from the refrigerator to water but always allow the water to fully drain away before placing the pots back in the refrigerator.
Check the soil surface more closely after the 10th week of cold treatment for the emergence of the first white leaf or stem sprouts from the bulbs. Some species will take as long as the 16th week before the plants poke through the soil.
Relocate the pots from the cold treatment area once white tips emerge from the soil. Place them in a warm, sunny location that ideally is between 55 to 70 degrees F. This exposure to warmth and light will make the white shoots turn green and begin to grow more quickly. Don't put the pots atop a radiator or too close to a heat source. The heat will dry out soil more quickly and you run the risk of the bulbs growing too quickly or at awkward rates across the container.
Continue monitoring the container soil and water as needed to keep it moist. After you water, consider rotating the container 180 degrees so any leaning of plant shoots to the light is diminished.


