Bulbs
Flower Basics
Flower Beds & Specialty Gardens
Flower Garden
Garden Furniture
Garden Gnomes
Garden Seeds
Garden Sheds
Garden Statues
Garden Tools & Supplies
Gardening Basics
Green & Organic
Groundcovers & Vines
Growing Annuals
Growing Basil
Growing Beans
Growing Berries
Growing Blueberries
Growing Cactus
Growing Corn
Growing Cotton
Growing Edibles
Growing Flowers
Growing Garlic
Growing Grapes
Growing Grass
Growing Herbs
Growing Jasmine
Growing Mint
Growing Mushrooms
Orchids
Growing Peanuts
Growing Perennials
Growing Plants
Growing Rosemary
Growing Roses
Growing Strawberries
Growing Sunflowers
Growing Thyme
Growing Tomatoes
Growing Tulips
Growing Vegetables
Herb Basics
Herb Garden
Indoor Growing
Landscaping Basics
Landscaping Patios
Landscaping Plants
Landscaping Shrubs
Landscaping Trees
Landscaping Walks & Pathways
Lawn Basics
Lawn Maintenance
Lawn Mowers
Lawn Ornaments
Lawn Planting
Lawn Tools
Outdoor Growing
Overall Landscape Planning
Pests, Weeds & Problems
Plant Basics
Rock Garden
Rose Garden
Shrubs
Soil
Specialty Gardens
Trees
Vegetable Garden
Yard Maintenance
The Best Way to Transplant Ivy Plants
The Best Way to Transplant Ivy Plants. English ivy is an evergreen plant that is easily planted and easily grown, and within about two growing seasons, the ivy will become a dense, green mat. Although English ivy makes an effective ground cover, the plant will also scramble over a wall, fence or trellis. Transplant English ivy in autumn or early...
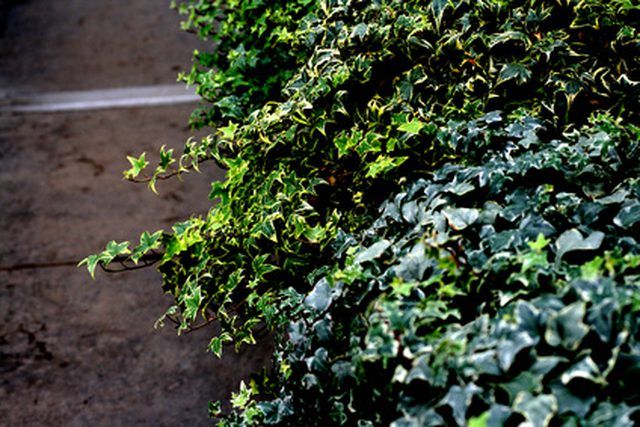
English ivy is an evergreen plant that is easily planted and easily grown, and within about two growing seasons, the ivy will become a dense, green mat. Although English ivy makes an effective ground cover, the plant will also scramble over a wall, fence or trellis. Transplant English ivy in autumn or early spring so the roots will be safely established before the hot days of summer. For best results, transplant English ivy on a cool, overcast day.
Things You'll Need
Tiller, shovel or garden fork
Rake
Organic matter
Shovel
Mulch
Prepare a planting spot for the transplanted English ivy ahead of time. English ivy will grow in sunny or shady areas, but requires well-drained soil. Use a tiller, shovel or garden fork to loosen the soil to a depth of at least 12 inches. Rake 2 to 3 inches of organic matter such as compost or dry leaves into the soil.
Dig a large clump of ivy. The size of the clump should be an easily manageable size, about 8 to 10 inches square. Use the shovel blade to divide the clump into halves or quarters.
Dig a hole in the prepared area, and save the removed soil in a small pile next to the hole. The hole should be just deep enough to accommodate the ivy's root ball, and at least twice as wide. Plant the ivy at the same depth as it was growing previously, as ivy planted too deeply will be susceptible to rot. Allow 6 to 12 inches between plants.
Fill the hole with reserved soil. Tamp the soil gently around the roots of the ivy.
Water the area deeply immediately after planting. After that time, give the English ivy an inch of water every week, unless it rains. After new growth appears, the roots have established and the plant will need water only during hot, dry weather.
Spread a 2-inch layer of chopped leaves or bark mulch around the English ivy to keep the soil moist and deter weeds.
Tips & Warnings
English ivy can become invasive, and should be planted only where its growth can be contained. In Oregon and Washington, the plant is a designated noxious weed, because of its tendency to spread rapidly, covering anything that stands in its way and killing trees by blocking available sunshine.


