Bulbs
Flower Basics
Flower Beds & Specialty Gardens
Flower Garden
Garden Furniture
Garden Gnomes
Garden Seeds
Garden Sheds
Garden Statues
Garden Tools & Supplies
Gardening Basics
Green & Organic
Groundcovers & Vines
Growing Annuals
Growing Basil
Growing Beans
Growing Berries
Growing Blueberries
Growing Cactus
Growing Corn
Growing Cotton
Growing Edibles
Growing Flowers
Growing Garlic
Growing Grapes
Growing Grass
Growing Herbs
Growing Jasmine
Growing Mint
Growing Mushrooms
Orchids
Growing Peanuts
Growing Perennials
Growing Plants
Growing Rosemary
Growing Roses
Growing Strawberries
Growing Sunflowers
Growing Thyme
Growing Tomatoes
Growing Tulips
Growing Vegetables
Herb Basics
Herb Garden
Indoor Growing
Landscaping Basics
Landscaping Patios
Landscaping Plants
Landscaping Shrubs
Landscaping Trees
Landscaping Walks & Pathways
Lawn Basics
Lawn Maintenance
Lawn Mowers
Lawn Ornaments
Lawn Planting
Lawn Tools
Outdoor Growing
Overall Landscape Planning
Pests, Weeds & Problems
Plant Basics
Rock Garden
Rose Garden
Shrubs
Soil
Specialty Gardens
Trees
Vegetable Garden
Yard Maintenance
How to Create Garden Gnomes
How to Create Garden Gnomes. Rumor has it that garden gnomes will make your flowers grow faster, your fruit set more quickly and your vegetables grow to enormous sizes. While there's no proof for any of those assertions, there's no denying that the little garden ornaments bring a touch of whimsy to your lawn or garden. They originated in the...
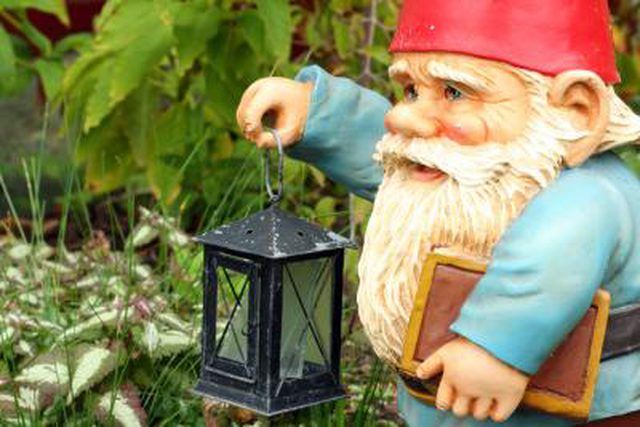
Rumor has it that garden gnomes will make your flowers grow faster, your fruit set more quickly and your vegetables grow to enormous sizes. While there's no proof for any of those assertions, there's no denying that the little garden ornaments bring a touch of whimsy to your lawn or garden. They originated in the Bavarian region of Germany in the late 18th century. In 1847, Sir Charles Isham of Northhamptonshire ordered 21 garden gnomes for his gardens at Lamport Hall. Lampy, the sole survivor of Lord Isham's collection, has been insured by his descendants for more than a million pounds. You can cast your own garden gnomes in concrete or resin for considerably less than that.
Things You'll Need
Oven-bakeable polymer clay
Plastic covered board
PVC pipe
Instant glue
Hacksaw
Vise
Pourable liquid latex or silicon
Sharp knife
Spray vegetable oil
Cheesecloth or paper
Duct tape
White portland cement
Play sand
Plastic tub
Mixing stick
Paints
Make the Mold
Sculpt a garden gnome from the clay and bake it following package directions on the clay. This will be the model for your mold. You can also choose to use a purchased garden gnome as your original model if you don't want to make your own design.
Stand the gnome in the center of the plastic covered board, securing it with a drop of instant bond glue. Don't overdo it with the glue. You'll want to be able to remove the gnome later.
Lock a piece of PVC pipe in your vise. The pipe should be at least 1/2 inch wider in diameter than the widest part of your gnome. Cut the pipe with a hacksaw so it is at least 2 inches taller than your gnome.
Spray the inside of the pipe and the garden gnome model with vegetable oil cooking spray or a commercial mold release product.
Place the pipe over the model, arranging it so that there is about 1/4 inch of space between the gnome and the wall of the pipe.
Roll a coil of modeling clay and press it firmly around the outside bottom of the pipe to seal the seam between the pipe and the board surface.
Mix the liquid silicon or latex according to the package directions.
Carefully pour the mixture into the pipe until it is just below the top of the mold. Pour to the side of the figurine rather than directly over it so that the liquid fills any undercuts or holes in the figure.
Allow the mold to cure according to the package directions. Some quick curing mold compounds will be ready in a few hours. Others may need to sit overnight.
Remove the coil of clay from around the bottom of the pipe. Slide the pipe off of the mold and carefully peel the mold off the plastic base.
Carefully cut the mold in half with a sharp knife, following the outline of the figure inside. Remove the original model from the center.
Casting the Gnome
Spray the faces of both halves of the mold with mold release or vegetable oil cooking spray.
Carefully align the two halves so that they match up. Wrap the outside with cheesecloth or a sheet of paper, then wrap duct tape around them to hold them together.
Mix one part portland cement with one part sand in a plastic bucket or tub.
Slowly add water while stirring the mixture until it is about the consistency of heavy pancake batter.
Stand the mold on a flat, level surface with the opening facing up. Carefully and slowly pour the cement mixture into the mold until it reaches the top.
Set the filled mold in a warm place to harden overnight.
Cut through and remove the tape and cheesecloth. Carefully separate the two halves of the mold and remove your concrete garden gnome.
Paint and detail your gnome as desired.
Tips & Warnings
Use the same procedure to cast a garden gnome from resin, following the package directions to mix the resin.


