Bulbs
Flower Basics
Flower Beds & Specialty Gardens
Flower Garden
Garden Furniture
Garden Gnomes
Garden Seeds
Garden Sheds
Garden Statues
Garden Tools & Supplies
Gardening Basics
Green & Organic
Groundcovers & Vines
Growing Annuals
Growing Basil
Growing Beans
Growing Berries
Growing Blueberries
Growing Cactus
Growing Corn
Growing Cotton
Growing Edibles
Growing Flowers
Growing Garlic
Growing Grapes
Growing Grass
Growing Herbs
Growing Jasmine
Growing Mint
Growing Mushrooms
Orchids
Growing Peanuts
Growing Perennials
Growing Plants
Growing Rosemary
Growing Roses
Growing Strawberries
Growing Sunflowers
Growing Thyme
Growing Tomatoes
Growing Tulips
Growing Vegetables
Herb Basics
Herb Garden
Indoor Growing
Landscaping Basics
Landscaping Patios
Landscaping Plants
Landscaping Shrubs
Landscaping Trees
Landscaping Walks & Pathways
Lawn Basics
Lawn Maintenance
Lawn Mowers
Lawn Ornaments
Lawn Planting
Lawn Tools
Outdoor Growing
Overall Landscape Planning
Pests, Weeds & Problems
Plant Basics
Rock Garden
Rose Garden
Shrubs
Soil
Specialty Gardens
Trees
Vegetable Garden
Yard Maintenance
How to Move a Storage Shed in My Backyard
How to Move a Storage Shed in My Backyard. There are several reasons that you may need to move your shed in your yard. Whatever your reason, the majority of sheds can be moved after some preparation and some thought. With the help of a few friends and a bit of work you can move a shed within your yard.
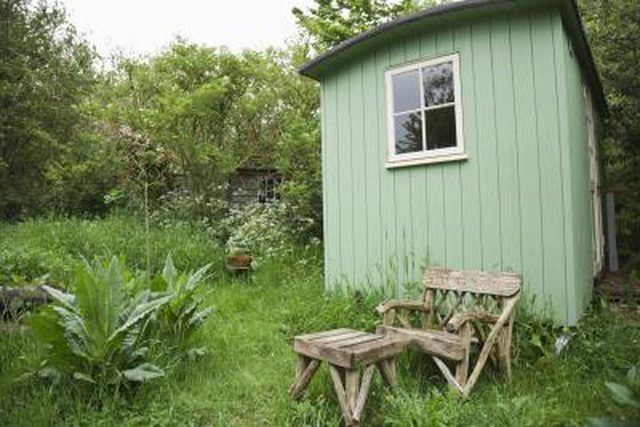
There are several reasons that you may need to move your shed in your yard. Whatever your reason, the majority of sheds can be moved after some preparation and some thought. With the help of a few friends and a bit of work you can move a shed within your yard.
Things You'll Need
Shovel
4-foot carpenter level
2 by 4 lumber
Landscape fabric
Gravel
Rake
2 floor jacks qty
3/4-inch plywood.
4 by 4 Pressure treated lumber
Timber screws
Power screw driver
PVC pipe
Shed anchor kit
Call the city or town to see if you are required to obtain any permits. Check with your local utilities and have the property flagged. Also check the property for septic lines, sprinkler system or low volt lighting that may be located where you plan on putting the shed.
Check to see if there are any site conditions that will affect the shed's location. These may be tree roots or limbs, low spots that stay soggy or have a tendency to flood, and fences or trees that make it hard to access the shed.
Decide on the new location for the shed's pad with the items listed above taken into account. Remove the sod around the perimeter of the shed. Use a shovel, sod cutter or rototiller for this; include a additional 12 inches around the shed. Level the pad with a four foot carpenter's level and 2 by 4 lumber. Use a shovel to add or remove dirt. Check to make sure it is level diagonally as well as side to side.
Put a layer of landscape fabric over the dirt and cover with four inches of gravel. Rake the gravel to make sure it is level.
Unload the shed of everything inside. Cross brace the interior. The bracing should run from the top plate on one wall across the shed and down to the bottom of the studs on the opposite wall. This should be done on each side of the shed creating a "X." This will help to keep the shed from shifting while it is moved.
Dig out all of the corners of the shed. The hole deep enough to fit a floor jack, available at any auto parts store, and a piece of 3/4-inch plywood, large enough to support the jack, under the edge of the shed.
Raise the shed about nine inches on one side of the shed at a right angle to the direction of travel. Use two floor jacks for this. Check to see if the shed has 4 by 4 pressure treated skids and if the are running in the direction of travel. If not add a 4 by 4 pressure treated timbers and attach with timber screws to the shed deck. Repeat for the opposite side if the skid is needed.
Jack up the shed starting on the side that the shed will be moving. Place two sections of schedule 40 PVC beneath the skids, evenly spaced, running in the opposite direction of the skids.
Lower jacks slowly and jack up the opposite side to install one more piece of PVC pipe.
Lower the shed slowly again. Roll the shed on the PVC pipe slowly. As one piece of PVC pipe comes out the back, move it to the front of the shed and keep repeating until you get to the new pad.
Lower shed at the new location. Anchor the shed in place.
Tips & Warnings
Take your time and move slowly, this will help to prevent damage to the shed.
Lower the shed slowly so you don't force the PVC into the ground or crack it.


