Bulbs
Flower Basics
Flower Beds & Specialty Gardens
Flower Garden
Garden Furniture
Garden Gnomes
Garden Seeds
Garden Sheds
Garden Statues
Garden Tools & Supplies
Gardening Basics
Green & Organic
Groundcovers & Vines
Growing Annuals
Growing Basil
Growing Beans
Growing Berries
Growing Blueberries
Growing Cactus
Growing Corn
Growing Cotton
Growing Edibles
Growing Flowers
Growing Garlic
Growing Grapes
Growing Grass
Growing Herbs
Growing Jasmine
Growing Mint
Growing Mushrooms
Orchids
Growing Peanuts
Growing Perennials
Growing Plants
Growing Rosemary
Growing Roses
Growing Strawberries
Growing Sunflowers
Growing Thyme
Growing Tomatoes
Growing Tulips
Growing Vegetables
Herb Basics
Herb Garden
Indoor Growing
Landscaping Basics
Landscaping Patios
Landscaping Plants
Landscaping Shrubs
Landscaping Trees
Landscaping Walks & Pathways
Lawn Basics
Lawn Maintenance
Lawn Mowers
Lawn Ornaments
Lawn Planting
Lawn Tools
Outdoor Growing
Overall Landscape Planning
Pests, Weeds & Problems
Plant Basics
Rock Garden
Rose Garden
Shrubs
Soil
Specialty Gardens
Trees
Vegetable Garden
Yard Maintenance
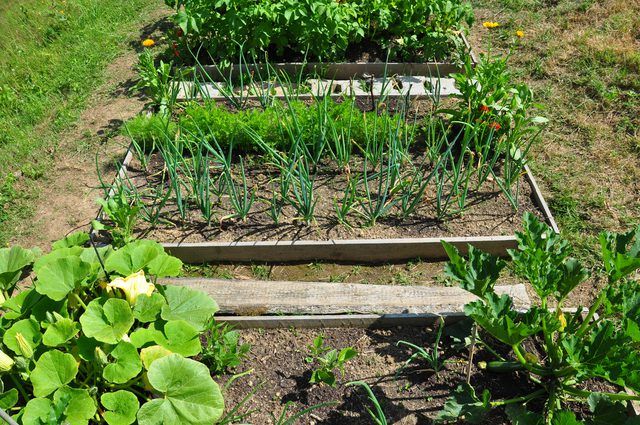
How to Cover Raised Beds With Plastic
Plastic bed covers protect plants by trapping solar heat and providing a barrier against insect pests.
Plastic covers can protect garden plants from cold temperatures and insects, but the best method for covering raised garden beds with plastic depends on the element from which you hope to protect the plants.
Soil Solarization
Soil solarization is a non-chemical method for controlling soil-borne pests such as bacteria, fungi, nematodes and weeds by raising the soil temperature high enough to kill the pest organisms. Soil heating is achieved by covering the soil in non-planted beds with clear plastic sheeting for a period of four to six weeks during the hottest part of summer. The plastic allows solar radiation to penetrate and then traps heat in the soil. In ideal conditions, the top 6 inches of soil can reach temperatures up to 140 degrees Fahrenheit.
Cover Placement for Soil Solarization
Things You'll Need
Rake
Watering device
Tape measure
Shovel or trowel
Clear plastic sheeting
Step 1
Prepare the raised beds' soil by raking it smooth and level. Water the beds so that the soil is moist to a depth of 12 inches.
Step 2
Dig a trench 4 to 6 inches deep on all sides of each bed, using a shovel or trowel.
Step 3
Lay clear plastic sheeting along one side of each bed, with the edge of the sheeting in the trench. Fill the trench soil to cover the edge of the plastic sheeting for each bed.
Step 4
Move to the opposite side of each bed, and pull the plastic sheeting across the bed, getting it as tight against the soil as possible. Holding the plastic taut, and bury this edge of the plastic in the trench on its side of the bed.
Step 5
Bury the other edges of the plastic in the trenches on the other sides of the beds, keeping the plastic flat and tight against the soil.
Floating Row Covers
Floating row covers are made from lightweight material and are laid over the tops of plants without the use of supports; burying or weighting their edges keeps the covers in place. These covers are permeable, allowing sunlight and water to pass through to plants, but heat becomes trapped beneath the covers, and they help to keep out pests. Many floating row covers are made of bonded synthetic fibers, but some are made from perforated plastic.
Floating row covers can be used early in the growing season to warm the soil and give cool-season crops a head start. During periods of freezing temperatures, however, plants that touch the covers may be damaged by the cold; so floating row covers are not a good choice when temperatures are very low.
Even though floating covers can be effective at keeping insect pests away from raised beds' plants, the beds must be free of insects before the covers are laid. Also, the covers' edges need to be adequately sealed in place, or else insects that manage to get underneath the covers will damage plants.
Hoop-Supported Covers
Heavier plastic covers must be supported with wire or plastic hoops so that the covers don't rest directly on plants. These covers require more work to install and maintain than floating row covers, but their thicker plastic provides more protection against cold temperatures. The covers rest on semi-circular hoops over the plants, forming a tunnel over each raised bed, and the edges of the covers are weighted, pinned or buried to keep them in place. Hoop-supported covers are the best choice to cover plants such as tomatoes (Solanum lycopersicum) and peppers (Capsicum spp.), which can be damaged by floating row covers.
Tip
For more information on prepping a raised vegetable bed for winter, see Raised Bed Vegetable Gardening Winter Care.
Cover Maintenance
Plastic sheeting can raise the temperature under it as much as 30 degrees Fahrenheit above the temperature outside it. So providing ventilation for covered raised beds when the sun is out and outside temperatures are warm is important. Remove the covers during the day, and put them back in place over the beds at night. Using slitted or perforated covers reduces the need to remove them. In hot climates, colored covers may be a better choice than clear or white covers because the darker covers cause less heat buildup.
In general, it's best to remove covers three to four weeks after plants are transplanted to the raised beds to allow insect pollinators access to the plants. Hoop-supported covers may be used over warm-season crops before the first frost in fall to protect the plants from cool temperatures and to encourage crop ripening.


