Bulbs
Flower Basics
Flower Beds & Specialty Gardens
Flower Garden
Garden Furniture
Garden Gnomes
Garden Seeds
Garden Sheds
Garden Statues
Garden Tools & Supplies
Gardening Basics
Green & Organic
Groundcovers & Vines
Growing Annuals
Growing Basil
Growing Beans
Growing Berries
Growing Blueberries
Growing Cactus
Growing Corn
Growing Cotton
Growing Edibles
Growing Flowers
Growing Garlic
Growing Grapes
Growing Grass
Growing Herbs
Growing Jasmine
Growing Mint
Growing Mushrooms
Orchids
Growing Peanuts
Growing Perennials
Growing Plants
Growing Rosemary
Growing Roses
Growing Strawberries
Growing Sunflowers
Growing Thyme
Growing Tomatoes
Growing Tulips
Growing Vegetables
Herb Basics
Herb Garden
Indoor Growing
Landscaping Basics
Landscaping Patios
Landscaping Plants
Landscaping Shrubs
Landscaping Trees
Landscaping Walks & Pathways
Lawn Basics
Lawn Maintenance
Lawn Mowers
Lawn Ornaments
Lawn Planting
Lawn Tools
Outdoor Growing
Overall Landscape Planning
Pests, Weeds & Problems
Plant Basics
Rock Garden
Rose Garden
Shrubs
Soil
Specialty Gardens
Trees
Vegetable Garden
Yard Maintenance
How to Protect Cedar Planters
How to Protect Cedar Planters. Cedar wood is one of the best material choices for outdoor planters. Cedar wood contains naturally occurring oils to protect against pests and rot. Cedar is a hearty, low-cost wood, often farmed from sustainable reserves. However, even this hearty wood can lose its luster over time. Despite the wood’s reputation...
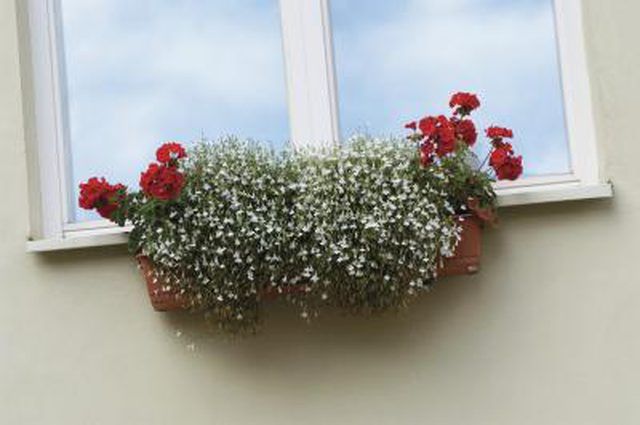
Cedar wood is one of the best material choices for outdoor planters. Cedar wood contains naturally occurring oils to protect against pests and rot. Cedar is a hearty, low-cost wood, often farmed from sustainable reserves. However, even this hearty wood can lose its luster over time. Despite the wood�s reputation for longevity, regular upkeep is essential to ensure that the wood is well protected from the elements. If you follow the right protective steps, your cedar planters will enjoy extra durability on top of their natural resistance.
Things You'll Need
Wood stain
Tarp
Orange oil
Water
Scrub brush
Dish soap
Bleach
Rubber gloves
Sponge
Rag
Stain your cedar planters for protection from the sun�s UV rays. If you want to retain the natural cedar look, there are some clear or "neutral" stains on the market designed strictly for protection without colorization. Just make sure the stain you select contains UV inhibitors. UV damage is one of the leading causes of cedar wood discoloration, leading to a gray, washed-out look.
Cover planters when they are not in use. A small protective tarp will keep potential water damage at bay. More importantly, covering your planters will further block harmful UV damage.
Oil the surface of the planter once every six months. Make sure you use a natural oil, such as orange oil or an equivalent. Oiling your planters will help keep the wood naturally moist and protect against drying out and cracking. Oil also returns shine to the wood for a fresh appearance.
Clean your cedar planters monthly to help protect against staining or discoloration. Many people simply assume that outdoor rainstorms will wash away dirt and debris, but the fact is much of the grime cannot be removed without vigorous scrubbing. Plain water and a scrub brush will help you get rid of most of the dirt caked on your planter. However, in some cases you may need to use some dish soap to wash away excess grime.
Apply diluted bleach to the cedar planters only if you notice mold. Bleach will kill the mold, but there is also a chance that it will discolor the planter, so you should only use this as a last resort. When using bleach, add a cup of bleach to a gallon of water for proper dilution. Wear rubber gloves to protect your hands and use a sponge or rag for application. Also, make sure you use the bleach solution on the entire planter, not just the moldy area; if the bleach discolors the planter, it will be less noticeable if the entire planter has been equally discolored. After application, do not rinse of the solution; let it sit for maximum penetration and mold removal.


