Bulbs
Flower Basics
Flower Beds & Specialty Gardens
Flower Garden
Garden Furniture
Garden Gnomes
Garden Seeds
Garden Sheds
Garden Statues
Garden Tools & Supplies
Gardening Basics
Green & Organic
Groundcovers & Vines
Growing Annuals
Growing Basil
Growing Beans
Growing Berries
Growing Blueberries
Growing Cactus
Growing Corn
Growing Cotton
Growing Edibles
Growing Flowers
Growing Garlic
Growing Grapes
Growing Grass
Growing Herbs
Growing Jasmine
Growing Mint
Growing Mushrooms
Orchids
Growing Peanuts
Growing Perennials
Growing Plants
Growing Rosemary
Growing Roses
Growing Strawberries
Growing Sunflowers
Growing Thyme
Growing Tomatoes
Growing Tulips
Growing Vegetables
Herb Basics
Herb Garden
Indoor Growing
Landscaping Basics
Landscaping Patios
Landscaping Plants
Landscaping Shrubs
Landscaping Trees
Landscaping Walks & Pathways
Lawn Basics
Lawn Maintenance
Lawn Mowers
Lawn Ornaments
Lawn Planting
Lawn Tools
Outdoor Growing
Overall Landscape Planning
Pests, Weeds & Problems
Plant Basics
Rock Garden
Rose Garden
Shrubs
Soil
Specialty Gardens
Trees
Vegetable Garden
Yard Maintenance
How to Grow Pepperoncini
How to Grow Pepperoncini. The pepperoncini is a type of pepper that is also known as Tuscan pepper, sweet Italian pepper and golden Greek pepper. These mild peppers are frequently served with pizza and offer a tangy flavor. They are grown in much the same way that other peppers are grown. After growth, these peppers are usually pickled and placed...
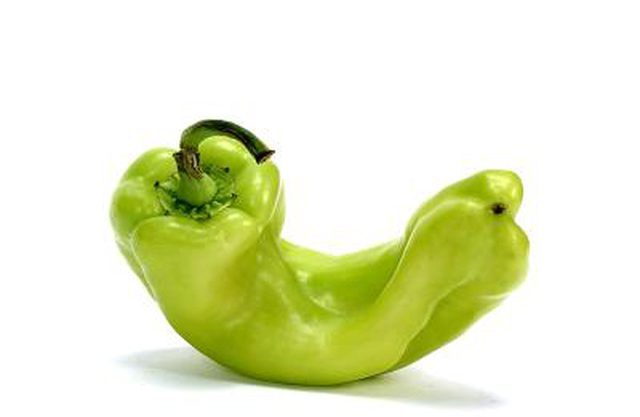
The pepperoncini is a type of pepper that is also known as Tuscan pepper, sweet Italian pepper and golden Greek pepper. These mild peppers are frequently served with pizza and offer a tangy flavor. They are grown in much the same way that other peppers are grown. After growth, these peppers are usually pickled and placed into jars for sale.
Things You'll Need
Container
All-purpose potting soil
Mulch
Stake
String
Start your pepperoncini plants as seeds inside in the early spring or late winter. Press the seeds approximately a quarter-inch into a good, all-purpose potting soil. Water them daily to keep them moist and place the containers in a sunny window. Typically, you will being to see seedlings in one to two weeds.
Transplant your seedlings outside when the night temperatures are consistently above 55 degrees and there is no longer a threat of frost. Soak the pots before you transplant your peppers. Make sure the root ball is completely soaked. You do not want the soil to dry out.
Choose a sunny location for your seedlings. Dig a hole that is the same size as the pot that you are transplanting the peppers from. Separate the roots a little to loosen them so they will spread out after they are planted. Set the seedling into the ground and cover it back with the original soil that came from the hole.
Place your plants 10 to 15 inches apart in rows. This will give you enough room between plants to harvest and will provide your plants with enough room to grow.
Apply a 2- to 4-inch layer of mulch around your plants so that they will maintain their water balance and not dry out. This will also keep the moisture evenly distributed and help to cut down on weeds in your garden.
Water your plants daily while they are growing with at least an inch of water. For a hotter pepper you can water the plants once a week, but do not wait longer than that or the pods will dry out.
Stake your pepper plants once they begin to grow and develop heavy pods. This will prevent the plants from breaking. Drive a stake into the ground and use string to tie the plant up.
Harvest your pepper plants when they are 2 to 3 inches long and are a bright green in color. They will store in the refrigerator for several weeks, or you can freeze them for up to a year. Pickling preserves them for several years.


