Bulbs
Flower Basics
Flower Beds & Specialty Gardens
Flower Garden
Garden Furniture
Garden Gnomes
Garden Seeds
Garden Sheds
Garden Statues
Garden Tools & Supplies
Gardening Basics
Green & Organic
Groundcovers & Vines
Growing Annuals
Growing Basil
Growing Beans
Growing Berries
Growing Blueberries
Growing Cactus
Growing Corn
Growing Cotton
Growing Edibles
Growing Flowers
Growing Garlic
Growing Grapes
Growing Grass
Growing Herbs
Growing Jasmine
Growing Mint
Growing Mushrooms
Orchids
Growing Peanuts
Growing Perennials
Growing Plants
Growing Rosemary
Growing Roses
Growing Strawberries
Growing Sunflowers
Growing Thyme
Growing Tomatoes
Growing Tulips
Growing Vegetables
Herb Basics
Herb Garden
Indoor Growing
Landscaping Basics
Landscaping Patios
Landscaping Plants
Landscaping Shrubs
Landscaping Trees
Landscaping Walks & Pathways
Lawn Basics
Lawn Maintenance
Lawn Mowers
Lawn Ornaments
Lawn Planting
Lawn Tools
Outdoor Growing
Overall Landscape Planning
Pests, Weeds & Problems
Plant Basics
Rock Garden
Rose Garden
Shrubs
Soil
Specialty Gardens
Trees
Vegetable Garden
Yard Maintenance
How to Get Your Sprinkler System Ready for Winter
How to Get Your Sprinkler System Ready for Winter. Sprinkler systems are great during warm weather, but they are at risk for broken pipes and sprinkler heads when cold weather rolls around. Once the time for watering is past for the year, it’s best to winterize your sprinkler system to prevent problems caused by freezing. The most important...
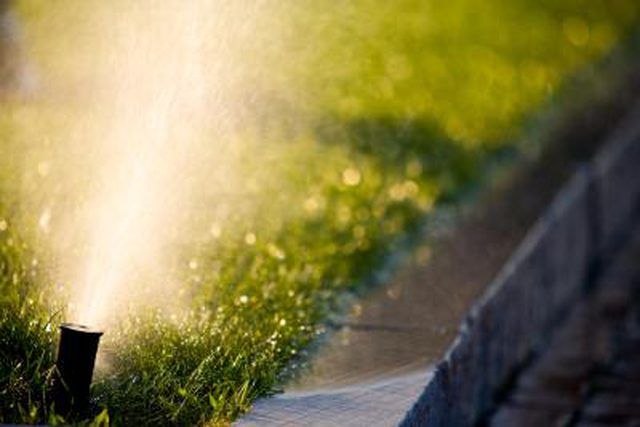
Sprinkler systems are great during warm weather, but they are at risk for broken pipes and sprinkler heads when cold weather rolls around. Once the time for watering is past for the year, it�s best to winterize your sprinkler system to prevent problems caused by freezing. The most important step is to remove all water from the pipes so there is none left in the system that can freeze.
Things You'll Need
Wrench, adjustable
Air compressor, 5 HP with 30 gal. tank
Turn on your sprinkler system, then close the shut-off valve. Doing this while the sprinklers are running allows you to make sure the valve gets closed all the way. You will be able to tell because the sprinklers will stop running, and in most cases you can also hear when the water stops flowing through the main pipe. It is important to make sure you get the valve shut off completely. This step also depressurizes the pipes.
Open or remove the main drain plug, as well as any other plugs that might be part of your system. This may require the use of an adjustable wrench. Some plugs have a lever that you point to "drain," others require that you completely unscrew the plug from the pipe. If you must remove your drain plug, store it in a safe place until spring.
Turn on the air compressor and pressurize it to 70 PSI. Set your sprinkler to zone one, if you have multiple watering zones.
Inject air into your sprinkler system to force out any standing water. Allow the air to flow through the system until the tank pressure gauge reads 40 PSI. Shut off the air. Allow the tank to recharge to 70 PSI. Switch the sprinklers to zone two and force air though the system again. Repeat this process for each zone in your system.
Return to zone one, and blow compressed air through the pipes again. It will take three to four repetitions of this process in order to remove all of the water; more if your compressor is weaker or smaller than what is recommended for this task. Repeat the process until the water has been removed from the pipes of all watering zones.
Detach the drain plug that is near the shutoff valve to let the remaining water drain from the system. Do not replace this plug until spring. Leave drain plugs off of the sprinkler system for the winter to help minimize the risk of your pipes freezing. Leave adjustable valves in the open position.


