Bulbs
Flower Basics
Flower Beds & Specialty Gardens
Flower Garden
Garden Furniture
Garden Gnomes
Garden Seeds
Garden Sheds
Garden Statues
Garden Tools & Supplies
Gardening Basics
Green & Organic
Groundcovers & Vines
Growing Annuals
Growing Basil
Growing Beans
Growing Berries
Growing Blueberries
Growing Cactus
Growing Corn
Growing Cotton
Growing Edibles
Growing Flowers
Growing Garlic
Growing Grapes
Growing Grass
Growing Herbs
Growing Jasmine
Growing Mint
Growing Mushrooms
Orchids
Growing Peanuts
Growing Perennials
Growing Plants
Growing Rosemary
Growing Roses
Growing Strawberries
Growing Sunflowers
Growing Thyme
Growing Tomatoes
Growing Tulips
Growing Vegetables
Herb Basics
Herb Garden
Indoor Growing
Landscaping Basics
Landscaping Patios
Landscaping Plants
Landscaping Shrubs
Landscaping Trees
Landscaping Walks & Pathways
Lawn Basics
Lawn Maintenance
Lawn Mowers
Lawn Ornaments
Lawn Planting
Lawn Tools
Outdoor Growing
Overall Landscape Planning
Pests, Weeds & Problems
Plant Basics
Rock Garden
Rose Garden
Shrubs
Soil
Specialty Gardens
Trees
Vegetable Garden
Yard Maintenance
How to Troubleshoot an Irrigation Control Valve
How to Troubleshoot an Irrigation Control Valve. An automatic irrigation system can make easy work out of watering your landscape. Gone are the days of dragging hoses around the house to make sure all your plant life is watered. While the systems are pretty much maintenance-free, there always seems to be the occasional irrigation valve that refuses...
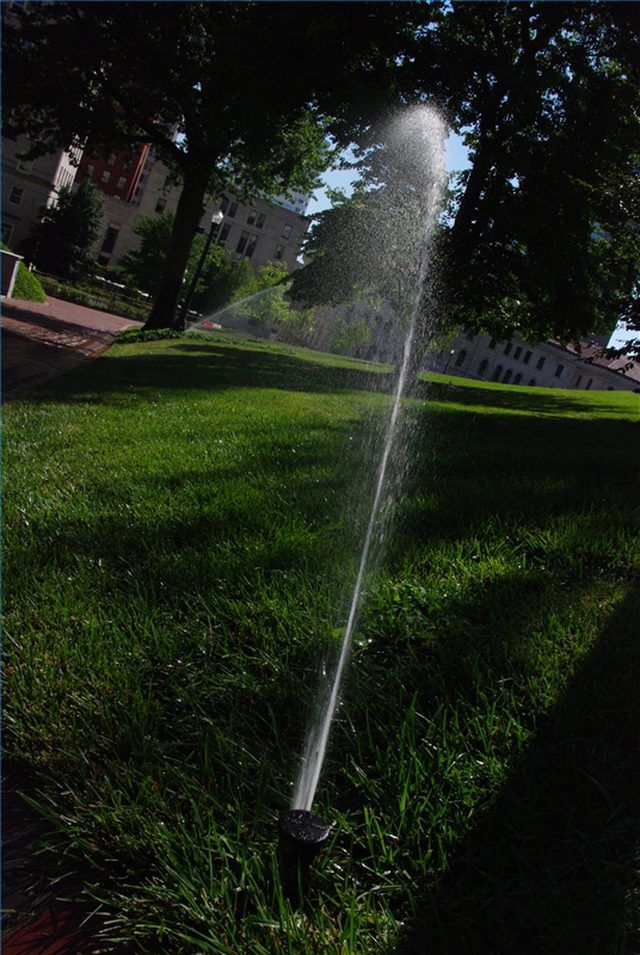
An automatic irrigation system can make easy work out of watering your landscape. Gone are the days of dragging hoses around the house to make sure all your plant life is watered. While the systems are pretty much maintenance-free, there always seems to be the occasional irrigation valve that refuses to operate properly.
Things You'll Need
Shovel
Phillips screwdriver
Small bucket or cup
Towel
Check the irrigation clock. Did it lose power? Alternatively, was the battery strength sufficient to maintain the clocks settings? Try cycling through the program to see if you can get the valve in question to respond. All modern irrigation clocks have a manual setting that allows you to turn the valves on and off electronically. Cycle through this a couple of times to see if the valve will respond. If this works, sometimes the solenoid (electronic actuator) will hang up, which can loosen the parts. If not, you will need to open and close the valve manually.
Locate the troublesome valve. It will be located in a valve box buried in the yard. If you have a schematic of the installation, this will help; otherwise, you will have to look for it. Check in the shrub beds and the borders of the grass.
Once found, follow the two wires on top the valve to the solenoid. You can turn on most brands of electronic valves by slowly turning the solenoid slightly to the left. If after a 1/2- to 3/4-turn the valve does not open, look for a small bleeder screw on top of the valve. You can open these with your fingers; however, be careful because if you open it too far, the water will spray you. If you are able to manually open and close the valve, go to Step 4. If not, jump past Step 4 to Step 5.
Before working with the electrical components of the valve, unplug the clock to disconnect the power. Return to the valve and locate the two leads running to the solenoid. They will have some form of wire connector on them, which are usually a watertight wire nut. Disconnect these nuts, clean the connection and re-install the wire nut. Plug the clock back in and test the valve. If this works, reset the clock and the task is complete. If not, you will need to clean the valve.
Shut off the water to the irrigation system. Dig around the valve box creating a large enough hole to allow water to drain from the valve. This hole should be at least 6 to 8 inches around the valve and 6 inches underneath. This will give you the room to bail out the water with a cup if needed.
Since there are a myriad of valves on the market, you should find a schematic of your brand online so you can determine the best method to dismantle it. Most of them will have screws holding down the top, or the whole top will unscrew. There will be water, so bail it out of the hole you dug as you take it apart; this will keep dirt from getting in the valve.
Once the valve top is off, you should find a rubber fitting and a large spring. Take these apart and clean them. Clean out the inside of the valve body, and remove any dirt or rocks. Even the smallest piece of gravel can cause an issue in your valve. Reassemble the valve, turn the water on and test its operation. These steps will generally fix most valve issues. If the valve still will not work, the valve will need replacement.
Tips & Warnings
Make sure the water is off before working on the valve.
If the valve works in Step 1 and the problem returns, it is probably a solenoid issue. Replacement is easy without changing the whole valve. Check with the manufacturer for instructions


