Bulbs
Flower Basics
Flower Beds & Specialty Gardens
Flower Garden
Garden Furniture
Garden Gnomes
Garden Seeds
Garden Sheds
Garden Statues
Garden Tools & Supplies
Gardening Basics
Green & Organic
Groundcovers & Vines
Growing Annuals
Growing Basil
Growing Beans
Growing Berries
Growing Blueberries
Growing Cactus
Growing Corn
Growing Cotton
Growing Edibles
Growing Flowers
Growing Garlic
Growing Grapes
Growing Grass
Growing Herbs
Growing Jasmine
Growing Mint
Growing Mushrooms
Orchids
Growing Peanuts
Growing Perennials
Growing Plants
Growing Rosemary
Growing Roses
Growing Strawberries
Growing Sunflowers
Growing Thyme
Growing Tomatoes
Growing Tulips
Growing Vegetables
Herb Basics
Herb Garden
Indoor Growing
Landscaping Basics
Landscaping Patios
Landscaping Plants
Landscaping Shrubs
Landscaping Trees
Landscaping Walks & Pathways
Lawn Basics
Lawn Maintenance
Lawn Mowers
Lawn Ornaments
Lawn Planting
Lawn Tools
Outdoor Growing
Overall Landscape Planning
Pests, Weeds & Problems
Plant Basics
Rock Garden
Rose Garden
Shrubs
Soil
Specialty Gardens
Trees
Vegetable Garden
Yard Maintenance
How to Propagate Bottlebrush Plants From Cuttings
How to Propagate Bottlebrush Plants From Cuttings. The long hot days of summer invite the gardener to relax after the spring planting season, but if you want to propagate bottlebrush shrubs (Callistemon spp.), summer is the time to start. The two common types of bottlebrush shrubs are weeping bottlebrush (Callistemon viminalis), hardy in U.S....
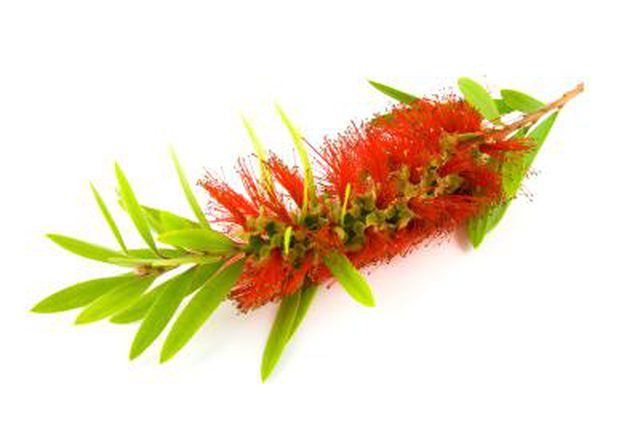
The long hot days of summer invite the gardener to relax after the spring planting season, but if you want to propagate bottlebrush shrubs (Callistemon spp.), summer is the time to start. The two common types of bottlebrush shrubs are weeping bottlebrush (Callistemon viminalis), hardy in U.S. Department of Agriculture plant hardiness zones 9b through 11, and crimson bottlebrush (Callistemon citrinis), hardy in USDA zones 9a through 11. Both root well from semihardwood cuttings and require similar treatment during the rooting process. Weeping bottlebrush, however, often roots a few weeks faster than crimson bottlebrush.
Things You'll Need
Pruning shears
Rubbing alcohol
Rooting hormone powder
Bowl
Perlite
Vermiculite
6- to 8-inch-diameter pot
2 dowels, 12-inch
Clear plastic bag
Rubber band
Clean spray bottle with mister top
Cut 6-inch branch sections from the tips of an actively growing bottlebrush. Take cuttings in the summer for weeping bottlebrush plants and late summer for crimson bottlebrush. Use a pair of sharp hand-held pruning shears and cut at a 45-degree angle.
Pinch or clip the leaves off of the bottom one-half of the cutting. Use clippers or sharp fingernails to pinch off the branches without damaging or pulling on the bark.
Clip off any flowers at the top of the cutting. Also remove flower buds from the tip of the bottlebrush cutting if any are visible.
Clean your pruning tools before and after taking bottlebrush cuttings to prevent disease spread in the garden. Dip each tool blade in a mixture of half water and half rubbing alcohol, then allow it to dry.
Dip the cut end of the bottlebrush cuttings in hormone rooting powder. To avoid contaminating the tub, put a tablespoon or two in a bowl for each rooting project.
Make a sterile rooting medium using equal parts perlite and vermiculite. Mix the rooting medium in a bucket; a 1-gallon bucket works for small projects. Add water until the mix is damp and crumbly.
Fill a container with the prepared rooting medium. Use a 6- to 8-inch-diameter pot for single cuttings or a larger pot for multiple bottlebrush cuttings. Use only containers that have drainage holes in the bottom.
Slip your index finger, or a dowel or pencil, into the center of the pot about 3 inches deep and then slip the bottom end of the bottlebrush cutting into the hole. Push the mix around the cutting. Mist the cutting with clean water until the leaves are saturated.
Stick two 12-inch-tall dowels into the soil at the edge of the pot so that they stand at least 2 inches above the top of the cutting. Put a clear plastic bag over the pot and secure it around the base with a string or rubber band.
Set bottlebrush cuttings in an area out of direct sunlight where the temperature is 70 to 75 degrees Fahrenheit.
Pull off the plastic daily, or when the inside of the bag looks dry, and mist the leaves with clean water. Replace the bag after misting. Water the mix in the pot when it feels dry.
Look for new leaves to indicate successful rooting or give the cutting a very gentle tug to see if it holds firm in the soil. Roots should form within six to 10 weeks for weeping bottlebrush and 10 weeks for crimson bottlebrush.
Remove the plastic bag once the bottlebrush cutting roots but keep the container indoors or in a spot that remains around 70 to 75 degrees until spring. Water through the winter when the soil feels dry under your fingers.
Tips & Warnings
When taking cuttings for both weeping and crimson bottlebrush shrubs, look for wood that feels firm and has some striping on the bark. Avoid branches that are completely green or old, brown and brittle.
To make the rooting medium, you can alternately use equal parts clean sand and vermiculite or perlite and peat moss.
The plastic bag creates a humid environment and keeps the leaves damp. If you have a misting propagation box set up, however, it's even better than the plastic bag method, so go ahead and use it. Bottlebrush roots somewhat reluctantly and needs the moisture from the leaves to sustain it through the rooting process.
Both types of bottlebrush shrubs grow aggressively and are considered invasive in some areas.


