Bulbs
Flower Basics
Flower Beds & Specialty Gardens
Flower Garden
Garden Furniture
Garden Gnomes
Garden Seeds
Garden Sheds
Garden Statues
Garden Tools & Supplies
Gardening Basics
Green & Organic
Groundcovers & Vines
Growing Annuals
Growing Basil
Growing Beans
Growing Berries
Growing Blueberries
Growing Cactus
Growing Corn
Growing Cotton
Growing Edibles
Growing Flowers
Growing Garlic
Growing Grapes
Growing Grass
Growing Herbs
Growing Jasmine
Growing Mint
Growing Mushrooms
Orchids
Growing Peanuts
Growing Perennials
Growing Plants
Growing Rosemary
Growing Roses
Growing Strawberries
Growing Sunflowers
Growing Thyme
Growing Tomatoes
Growing Tulips
Growing Vegetables
Herb Basics
Herb Garden
Indoor Growing
Landscaping Basics
Landscaping Patios
Landscaping Plants
Landscaping Shrubs
Landscaping Trees
Landscaping Walks & Pathways
Lawn Basics
Lawn Maintenance
Lawn Mowers
Lawn Ornaments
Lawn Planting
Lawn Tools
Outdoor Growing
Overall Landscape Planning
Pests, Weeds & Problems
Plant Basics
Rock Garden
Rose Garden
Shrubs
Soil
Specialty Gardens
Trees
Vegetable Garden
Yard Maintenance
How to Propagate Hibiscus by Air Layering
How to Propagate Hibiscus by Air Layering. Hibiscus is a popular tropical plant because aside from its very attractive and colorful flowers, it is one of the easiest plants to propagate. The various ways to multiply hibiscus are through seeds, cuttings, grafting and air layering, also called marcotting or aerial rooting. Air layering is forcing a...
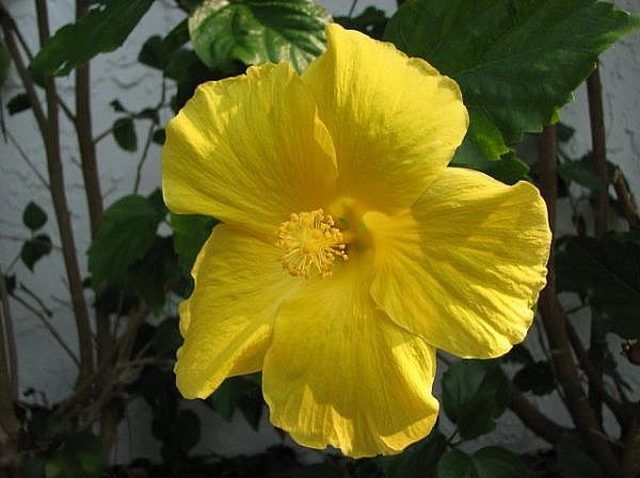
Hibiscus is a popular tropical plant because aside from its very attractive and colorful flowers, it is one of the easiest plants to propagate. The various ways to multiply hibiscus are through seeds, cuttings, grafting and air layering, also called marcotting or aerial rooting. Air layering is forcing a chosen branch to grow roots and become a whole new plant. Here's how.
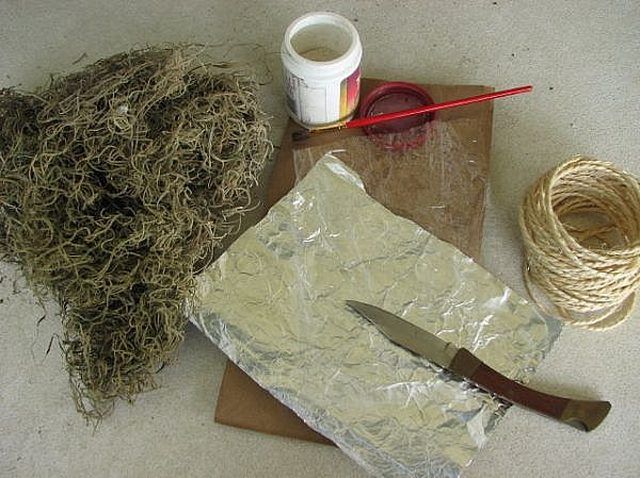
Things You'll Need
A mature hibiscus plant
Plastic sheet
Aluminum foil
Sphagnum moss
Brown paper
Twine, floral wire, tape or rubber band
Sharp knife
Rooting medium
Soft paintbrush
Prepare the things you'll need: a plastic sheet, aluminum foil and brown paper (all about 4-by-4 inches), rooting medium and a soft paintbrush, a handful of sphagnum moss (soaked in water), tying material like twine, cord, floral wire, tape or rubber band and a sharp knife.
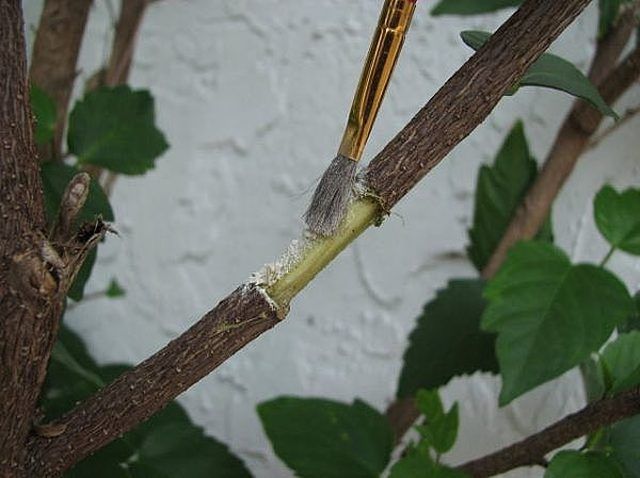
Choose a mature and healthy branch on the mother hibiscus plant. Through air layering, this branch will eventually be rooted and cut off to become the new plant. Pick a branch that is about the width of a pencil.
Using the sharp knife, make two cuts around the bark of the branch, 1 inch apart. Scrape off the bark and cambium layer (green layer) between the two cuts to expose the white core of the branch.

Use the paintbrush to apply a thin coat of rooting medium to the bared section of the branch. The rooting medium provides the nutrients necessary to induce root growth.
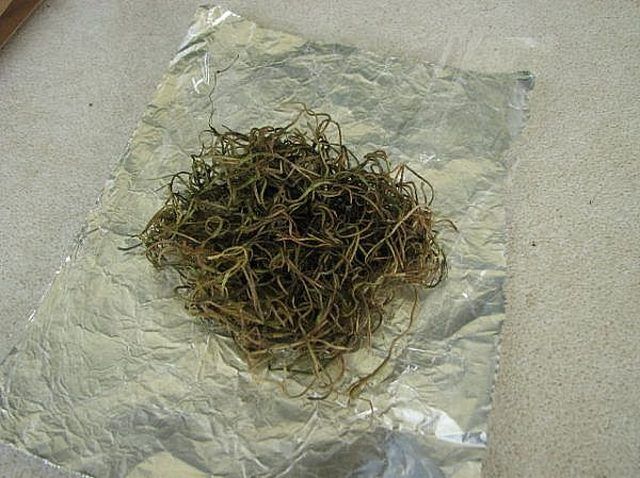
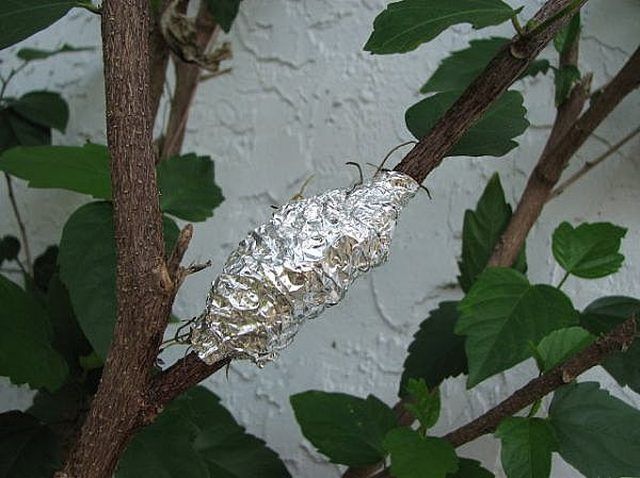
Lay the plastic sheet on the aluminum foil, and then lay the moist sphagnum moss on the plastic sheet.
Wrap the sphagnum moss, plastic sheet and aluminum foil around the bared section of the branch and squeeze tightly to secure the bundle. The plastic and aluminum sheets will seal the moisture in and provide the required humidity for root growth.
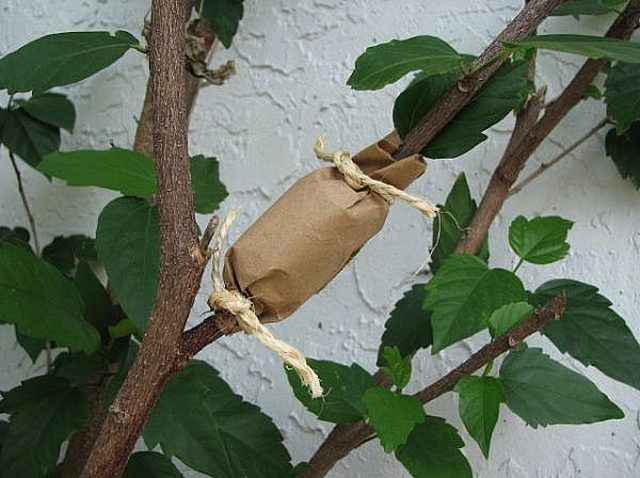
Wrap the bundle in brown paper and secure the ends with twine, floral wire, tape or rubber band. The brown paper will deter insects and birds from damaging the bundle.
Check the rooting after four weeks. If the air layering is successful and there is sufficient rooting, cut the branch below the root ball and transplant the new plant into its own pot or location in the garden.
Give the new hibiscus plant the same care needed by transplants: semi-shade, sufficient watering and moisture and regular fertilizer after 4 to 6 weeks. Trim some of the leaves to compensate for the breakaway from the mother plant.
Tips & Warnings
Soak the sphagnum moss for at least half an hour for optimum moisture.
Consider securing the sphagnum moss to minimize moisture loss by tying off the ends of the plastic sheet onto the branch before wrapping with aluminum foil.
When transplanting the rooted branch, do not try to remove the sphagnum moss because most of the small roots are already entwined in the moss.


