Bulbs
Flower Basics
Flower Beds & Specialty Gardens
Flower Garden
Garden Furniture
Garden Gnomes
Garden Seeds
Garden Sheds
Garden Statues
Garden Tools & Supplies
Gardening Basics
Green & Organic
Groundcovers & Vines
Growing Annuals
Growing Basil
Growing Beans
Growing Berries
Growing Blueberries
Growing Cactus
Growing Corn
Growing Cotton
Growing Edibles
Growing Flowers
Growing Garlic
Growing Grapes
Growing Grass
Growing Herbs
Growing Jasmine
Growing Mint
Growing Mushrooms
Orchids
Growing Peanuts
Growing Perennials
Growing Plants
Growing Rosemary
Growing Roses
Growing Strawberries
Growing Sunflowers
Growing Thyme
Growing Tomatoes
Growing Tulips
Growing Vegetables
Herb Basics
Herb Garden
Indoor Growing
Landscaping Basics
Landscaping Patios
Landscaping Plants
Landscaping Shrubs
Landscaping Trees
Landscaping Walks & Pathways
Lawn Basics
Lawn Maintenance
Lawn Mowers
Lawn Ornaments
Lawn Planting
Lawn Tools
Outdoor Growing
Overall Landscape Planning
Pests, Weeds & Problems
Plant Basics
Rock Garden
Rose Garden
Shrubs
Soil
Specialty Gardens
Trees
Vegetable Garden
Yard Maintenance
How to Connect a Drip Irrigation Line to a Sprinkler System
How to Connect a Drip Irrigation Line to a Sprinkler System. We recently dug up a lot of our lawn area because of water shortages in Southern California. Rather than replace the grass area with an expanse of colored rock, we decided to plant drought-tolerant shrubs. These require a lot less water and add greenery and color to our desert landscape....
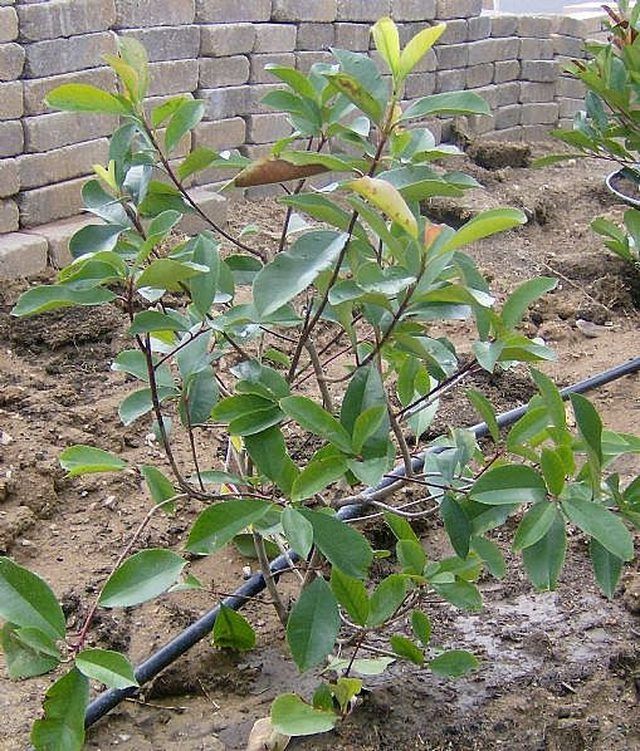
We recently dug up a lot of our lawn area because of water shortages in Southern California. Rather than replace the grass area with an expanse of colored rock, we decided to plant drought-tolerant shrubs. These require a lot less water and add greenery and color to our desert landscape.
Instead of simply running our water-heavy sprinkler circuit in the area of these new plants we decided to install a simple drip irrigation system. We disconnected the circuit in the new plant area and decided to link this new drip line to a currently-operating circuit. Here's how we did it.
Things You'll Need
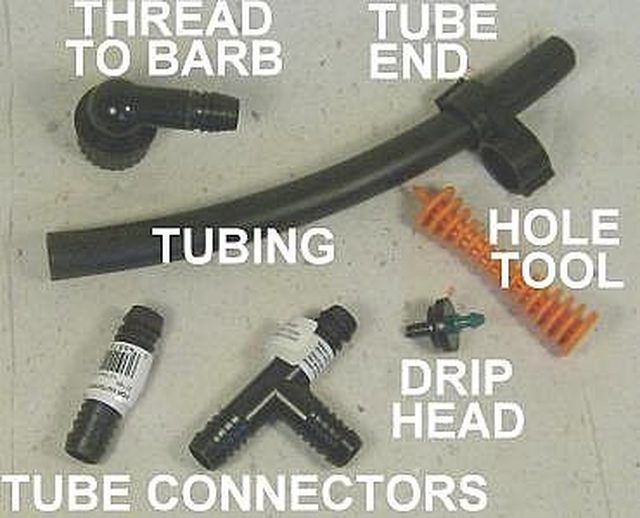
threaded plastic "T" (usually ? inch)
? inch threaded to barbed tubing connector
plastic ? inch diameter drip irrigation tubing
connectors
drip heads (1 gallon per hour (gph) or 2 gph,
tubing puncture tool (sharp piece of plastic)
tubing end device
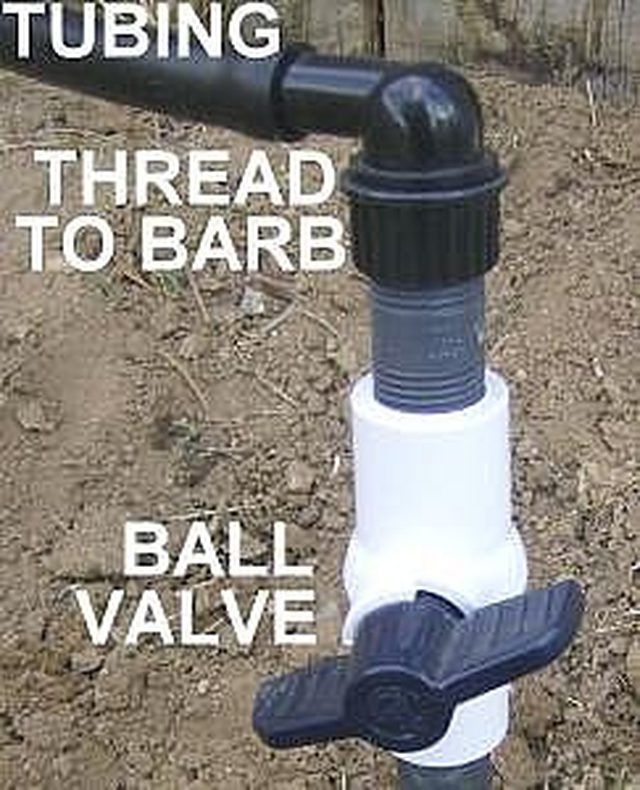
? inch PVC ball valve (optional)
Decide where you want your plants. Make sure you take into consideration where you'll be connecting to a nearby sprinkler - know where that will be.
VISIT A HARDWARE STORE. Find your way to the lawn irrigation/sprinkler aisle. Purchase a threaded plastic "T" (usually ? inch), a ? inch threaded to barbed tubing connector, the proper length of plastic ? inch diameter drip irrigation tubing, connectors (if you have to buy multiple reels of the tubing), drip heads (1 gallon per hour [gph] or 2 gph, depending on how much water you want to apply), a tubing puncture tool (sharp piece of plastic), and a tubing end device (it crimps the tubing, thus sealing the end).
OPTIONAL: a ? inch PVC ball valve, in case you want to adjust how much water goes to your plants.
FIND A CONNECTION. Find a current and active sprinkler circuit. Locate the sprinkler head nearest your project area. Check to see if your sprinklers run off of a standard ? inch pipe system.
MEASURE DISTANCES. Measure how many feet of plastic drip irrigation pipe you'll need from the identified connection to your project area.
GATHER TOOLS. You'll need a cutting instrument for the plastic tubing and the tubing puncture device mentioned in step #3. You may need the standard sprinkler tools as well, such as a wrench. Plumber's tape is handy at the connection point.
TAP INTO A CIRCUIT. Remove the identified sprinkler head. Dig out around the PVC socket that the head fits into. Place a threaded plastic "T" into the socket, with the "T" being 90 degrees from the upright position (looks like the "T" is on its side). Be sure to use plumber's tape in all threaded joints to minimize water leakage. Replace the sprinkler head on top of the "T". OPTION: at this point, on the end of the "T", install that adjustable PVC ball valve we mentioned, allowing you to modify how much water your plants get when watering.
CONNECT THREADED TO BARBED LINES. On the end of the "T", connect your threaded to barbed coupler. This item has a female threaded end and a ? inch barb on the other end. This is where you transition from the traditional sprinkler system to the plastic drip tubing. Using a turning motion, slide the tubing on to the barbed end of the connector. Push it in as far as it is able to go.
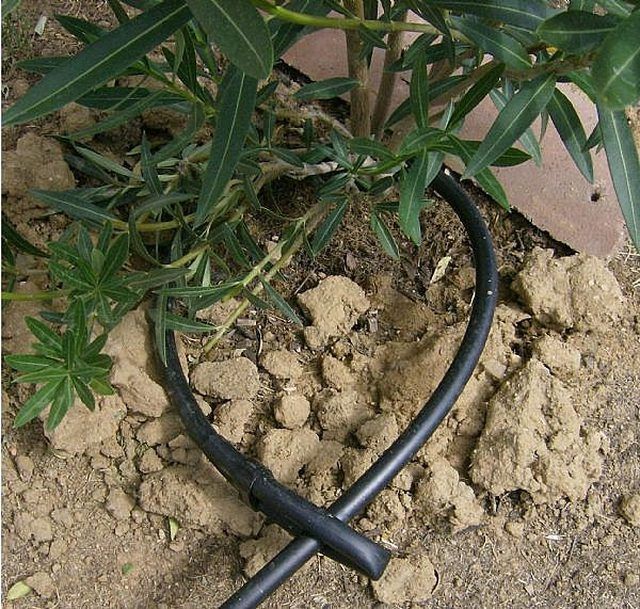
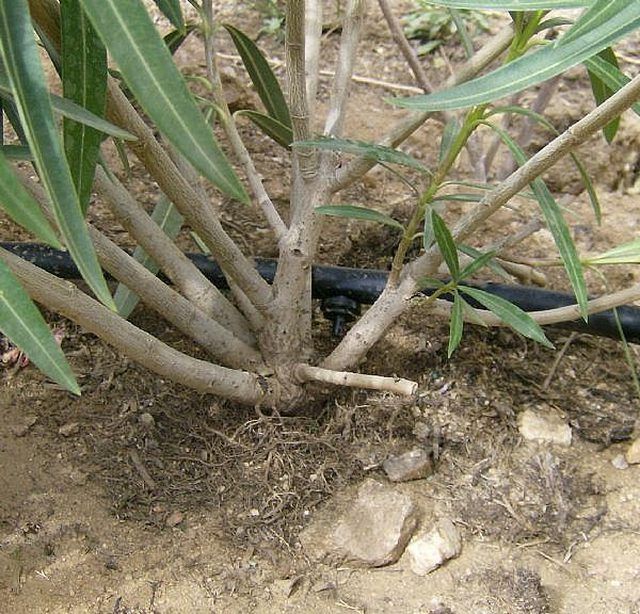
LAY OUT THE PLASTIC TUBING. From the threaded/barbed connector, stretch out the plastic tubing toward your newly installed plants. You can bury the tubing or simply lay it on the ground.
RUN YOUR SPRINKLERS. To clear out any dirt or debris, run your sprinklers for a minute or so. Watch where the water shoots at the end of the tubing! As the water runs, check your connection for leaks.
CAP THE TUBING. After looping the tubing around the last plant, use a tubing cap (usually shaped like the number "8") and crimp the tube back around itself. This will anchor the system, preventing the disturbance of the location of the drip heads.
INSERT DRIP HEADS. Using the tubing puncture tool (careful with your hand and fingers!), create a hole where you want the drip head to release the water, usually near the trunk of the plant. Insert the drip head into the new hole. It should "click" in, letting you know it is set. Repeat the procedure for every plant you are going to water on this drip line.
TEST THE SYSTEM. Turn on the appropriate sprinkler circuit and test the new drip system. You should see water gently dripping out at the base of each plant.
ADJUST THE SYSTEM. At this point, if you installed a ball valve at the "T", you can increase or decrease how much water goes into your system. In addition, you can add more drip heads per plant if you want more water to go to certain plants and less to others.

PLANT THE DROUGHT TOLERANT SHRUBS and ENJOY THE WATER SAVINGS!
Tips & Warnings
SUGGESTION: alternate laying the tubing on one side of one plant's trunk, and the opposite side of the next plant.


