Bulbs
Flower Basics
Flower Beds & Specialty Gardens
Flower Garden
Garden Furniture
Garden Gnomes
Garden Seeds
Garden Sheds
Garden Statues
Garden Tools & Supplies
Gardening Basics
Green & Organic
Groundcovers & Vines
Growing Annuals
Growing Basil
Growing Beans
Growing Berries
Growing Blueberries
Growing Cactus
Growing Corn
Growing Cotton
Growing Edibles
Growing Flowers
Growing Garlic
Growing Grapes
Growing Grass
Growing Herbs
Growing Jasmine
Growing Mint
Growing Mushrooms
Orchids
Growing Peanuts
Growing Perennials
Growing Plants
Growing Rosemary
Growing Roses
Growing Strawberries
Growing Sunflowers
Growing Thyme
Growing Tomatoes
Growing Tulips
Growing Vegetables
Herb Basics
Herb Garden
Indoor Growing
Landscaping Basics
Landscaping Patios
Landscaping Plants
Landscaping Shrubs
Landscaping Trees
Landscaping Walks & Pathways
Lawn Basics
Lawn Maintenance
Lawn Mowers
Lawn Ornaments
Lawn Planting
Lawn Tools
Outdoor Growing
Overall Landscape Planning
Pests, Weeds & Problems
Plant Basics
Rock Garden
Rose Garden
Shrubs
Soil
Specialty Gardens
Trees
Vegetable Garden
Yard Maintenance
How to Build a Wood Chaise Lounger
How to Build a Wood Chaise Lounger. The original French term "chaise longue" means "long chair." Americans change the French adjective to "lounge," which changes the meaning slightly and creates a name for a piece of lawn furniture. Built with a tilt back and a set of wheels, the chaise lounge is a versatile, movable piece that can be used as a...
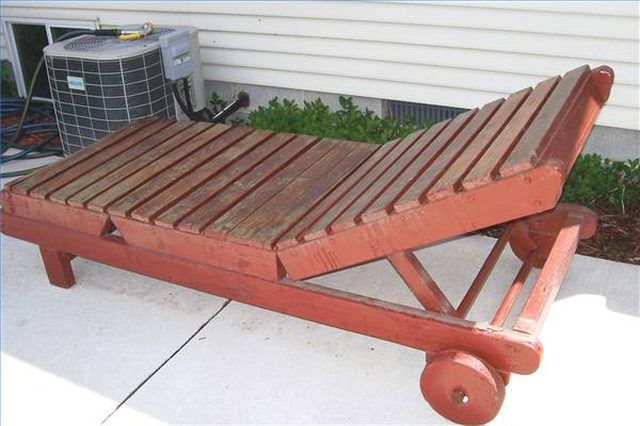
The original French term "chaise longue" means "long chair." Americans change the French adjective to "lounge," which changes the meaning slightly and creates a name for a piece of lawn furniture. Built with a tilt back and a set of wheels, the chaise lounge is a versatile, movable piece that can be used as a bench, a chair or a lounger for a summer snooze. With common supplies and tools, anyone with a little woodworking knowledge can build one of these traditional outdoor pieces in a weekend.
Things You'll Need
Drill
Adjustable wrenches
Screwdrivers
Two 2-by-2 inch cabinet hinges
1 3/4-inch wood screws
3 1/2-inch deck screws
Six 4-inch carriage bolts and washers
Two 1-by-36 inch wood dowels
1 foot of quarter-inch dowel or 2 extra-large cotter pins
Cedar, preserved or redwood lumber:
Two 2-by-4s, 30 inches long (head deck frame sides)
Two 2-by-4s, 54 inches long (foot deck frame sides)
Two 2-by-4s, 84 inches long (base deck frame sides)
Eight 2-by-4s, 24 inches long (ends)
Two 2-by-4s, 14 inches long (front legs)
One 2-by-2-by-21 inch piece (front leg brace)
Two 2-by-2-by-18 inch pieces (tilt supports)
Twenty 1-by-2-by-27 inch pieces (slats)
Two 2-by-8-by-8 inch pieces (wheels)
Two 2-by-6-by-8 inch pieces (supports)
Build a base frame 7 feet long and 27 inches wide, using deck screws to attach 24-inch 2-by-4 end pieces inside the 84-inch 2-by-4 side pieces. Use two deck screws at each corner, countersinking them a bit so they can be capped with a wood button or covered by wood filler. Build two deck supports the same way, using two 30-inch 2-by-4s and two 24-inch 2-by-4s for the head section and two 54-inch 2-by-4s---place one end piece so that half of it sticks up above the foot deck frame and use only one deck screw on each side---this end piece will be used to attach the base and foot deck frames together.

Attach the 14-inch 2-by-4 legs on the inside of the base frame about 18 inches in from one end of the frame; about 6 inches should form legs below the bottom edge of the frame and 3 1/2 inches should stick up above the frame as an anchor for the deck frame. Drill holes for one carriage bolt on the side of the frame and sink the bolt through the leg so the bolt heads lie flat in the wood. Repeat on the opposite side and brace the legs with a 2-by-2-by-21 inch piece, using one deck screw on each side.
Turn the base frame over the foot deck frame and match the edges; the 2-by-4 end of the foot deck frame should be near the center of the base frame. Attach the legs to the foot deck frame with carriage bolts in the same way as you attached them to the bottom and drive deck screws through the base deck frame into the inside end that is standing up into the base frame.
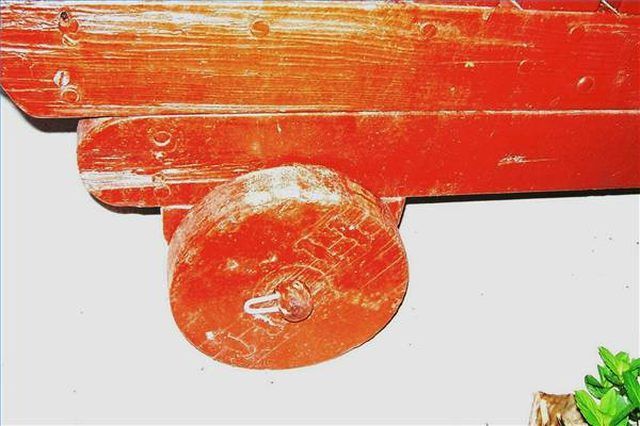
Build the wheels by rounding the 2-by-8-by-8 inch squares to circles. Attach 2-by-6-by-8-inch axle supports on the insides the same distance from the head end using deck screws from the inside. Trim the corners so that they don't bind if the lounge is tipped too steeply. Turn the assembled frame over and measure for axle placement on each side up about 2 to 2 1/2 inches from the base of the axle support---your wheel will drop about 4 inches from the center of this mark. Trim some wood off the support if necessary. Drill a 1-inch hole through each support and the centers of each wheel. Push a 36-inch wood dowel axle through and secure it with a cotter pin or small dowel.
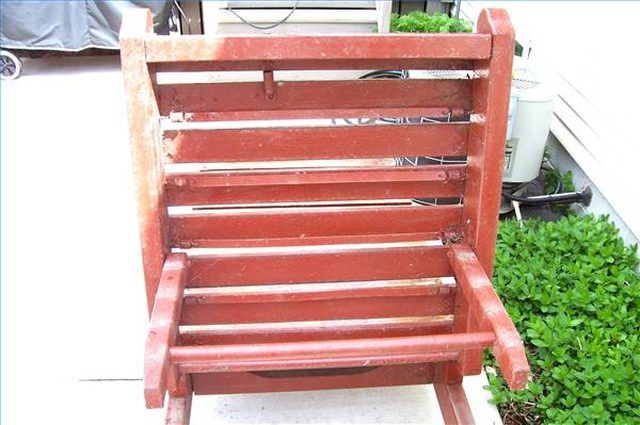
Attach one end of each tilt support to the head deck frame with carriage bolts so they can swing and attach a 1-inch dowel brace between them with deck screws. Notch pieces of wood and screw in place on both sides to hold the tilt supports. Attach the head deck frame at the sides with cabinet hinges and wood screws. Turn the assembled frame over and lay slats on the deck, leaving even spaces between them; screw them in place with wood screws.
Tips & Warnings
Use cedar or other exterior wood for outdoor furniture and use galvanized or exterior hardware for weather resistance.
When assembling the foot deck and base frames, support the head end of the base by slipping a 2-by-4 on its side under the edge or resting it on the head deck frame.
If you don't want wheels on your chaise lounge, cut four 10-inch 2-by-4 front legs and forego the wheels and supports.
Check twice before drilling axle holes and trim the bottom of the supports if necessary--lumber measurements are approximate at best and most lumber actually measures less than it's labeled. The only way to make sure the wheels roll right is to turn the frame over and measure "in situ" (as it sits) before cutting.


