Bulbs
Flower Basics
Flower Beds & Specialty Gardens
Flower Garden
Garden Furniture
Garden Gnomes
Garden Seeds
Garden Sheds
Garden Statues
Garden Tools & Supplies
Gardening Basics
Green & Organic
Groundcovers & Vines
Growing Annuals
Growing Basil
Growing Beans
Growing Berries
Growing Blueberries
Growing Cactus
Growing Corn
Growing Cotton
Growing Edibles
Growing Flowers
Growing Garlic
Growing Grapes
Growing Grass
Growing Herbs
Growing Jasmine
Growing Mint
Growing Mushrooms
Orchids
Growing Peanuts
Growing Perennials
Growing Plants
Growing Rosemary
Growing Roses
Growing Strawberries
Growing Sunflowers
Growing Thyme
Growing Tomatoes
Growing Tulips
Growing Vegetables
Herb Basics
Herb Garden
Indoor Growing
Landscaping Basics
Landscaping Patios
Landscaping Plants
Landscaping Shrubs
Landscaping Trees
Landscaping Walks & Pathways
Lawn Basics
Lawn Maintenance
Lawn Mowers
Lawn Ornaments
Lawn Planting
Lawn Tools
Outdoor Growing
Overall Landscape Planning
Pests, Weeds & Problems
Plant Basics
Rock Garden
Rose Garden
Shrubs
Soil
Specialty Gardens
Trees
Vegetable Garden
Yard Maintenance
How to Build a Sprinkler System
How to Build a Sprinkler System. It can get aggravating to constantly have to move the water sprinkler around to get everything watered in a vegetable or flower garden. A portable water sprinkler system is an ideal solution to this problem. Made in one long section with several sprinkler heads and attached to a water hose enables the user to put...
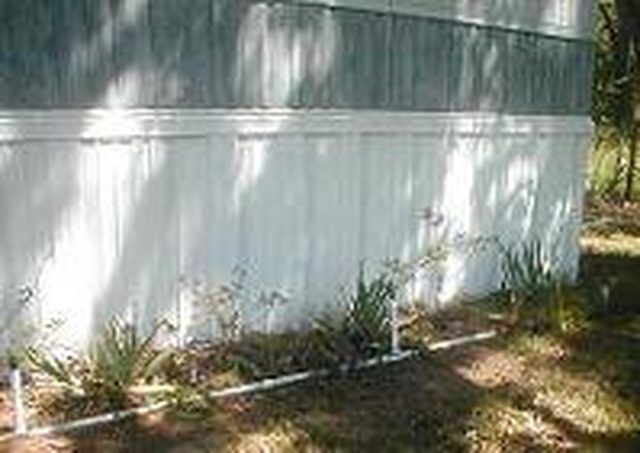
It can get aggravating to constantly have to move the water sprinkler around to get everything watered in a vegetable or flower garden. A portable water sprinkler system is an ideal solution to this problem. Made in one long section with several sprinkler heads and attached to a water hose enables the user to put the system where he wants it and just leave it. No plumbing or electrical work is required. It can also be customized by how many sprinkler heads are needed.
Things You'll Need
Measuring tape
PVC pipe, 1 inch in diameter
2, 1-foot sections of 1-inch PVC pipe
1 elbow
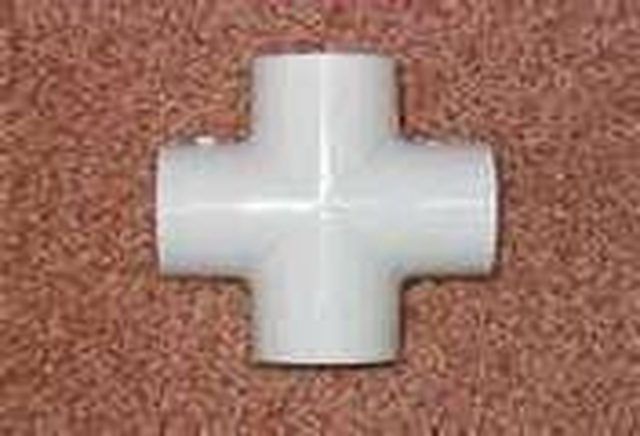
1 flat 4-way connector
Several T connectors
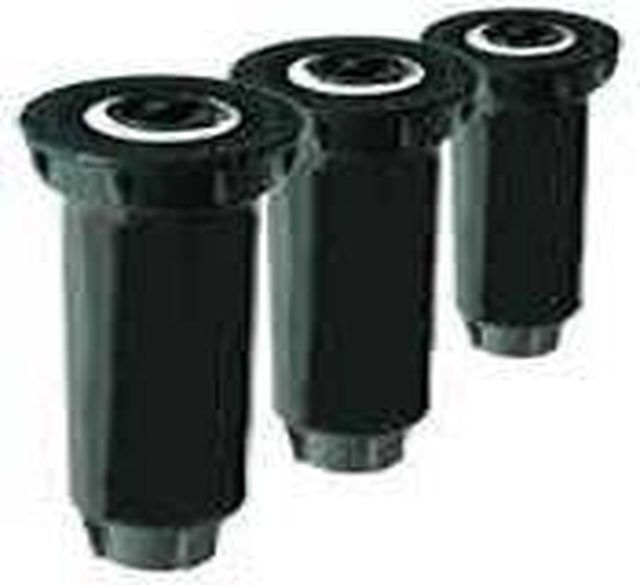
Sprinkler heads
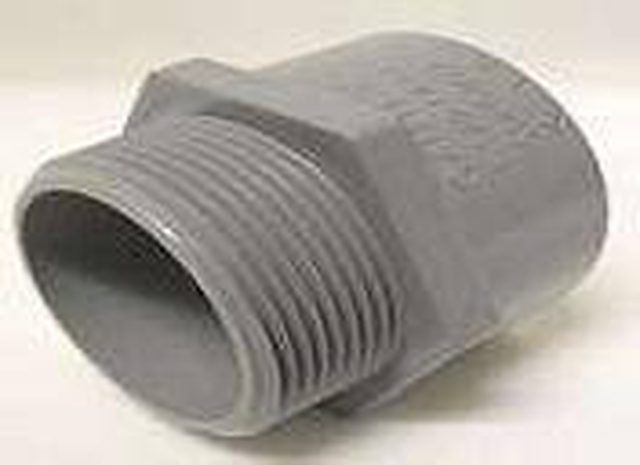
2 threaded 1-inch PVC pipe connectors
2 end caps
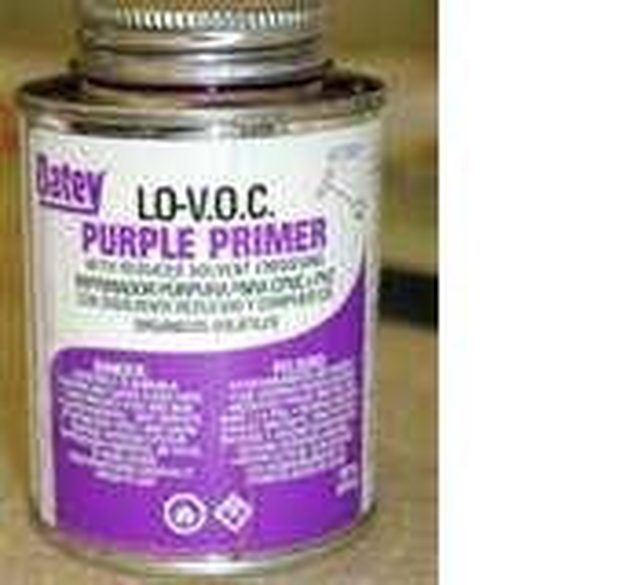
PVC pipe glue
Watering hose
Instructions
Determine how long you will need for the sprinkler system. This length will also determine how many sprinkler heads you will need, as a sprinkler head needs to be every 2 feet.
Have the lumberyard cut the PVC pipe into 2-foot lengths for a total of whatever length you need. For example, if you need 20 feet of sprinkler, you will need to have the pipe cut into 10 2-foot lengths. You will also need 2 1-foot lengths of pipe cut for the brace.
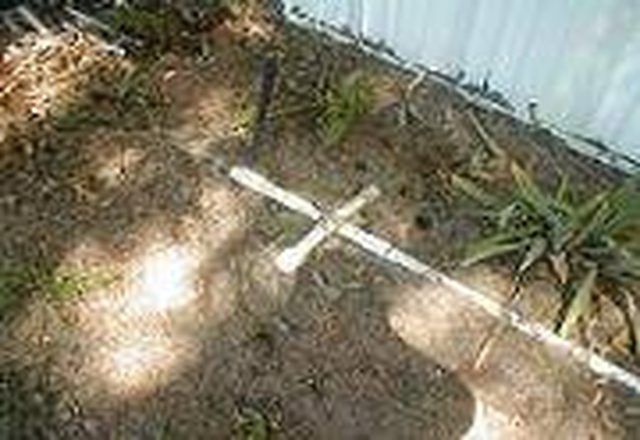
Dry fit this project first without the glue, because once you apply the glue, it will be permanent, and if you have missed part of a step, you will not be able to take it apart when the glue is applied. The glue will be applied in Step 8. Lay out the 2-foot sections on the ground, one after the other. In between each section, place a T-connector with the top hole facing up. This is the connector for the sprinkler head in a later step. Do not put T-connectors on the ends of the sprinkler system itself. Determine where the leg brace needs to go for stability. It should be somewhere close to the middle of the pipe length. Do not put a T-connector there. Instead, attach the pipe sections with a flat 4-way connector.
Attach the 1-foot sections to the flat 4-way for the leg braces. Place the end caps on each leg.
Attach an elbow in one end of the sprinkler system. This will be the end of the sprinkler system. At the other end, attach a threaded connector to connect to a water hose.

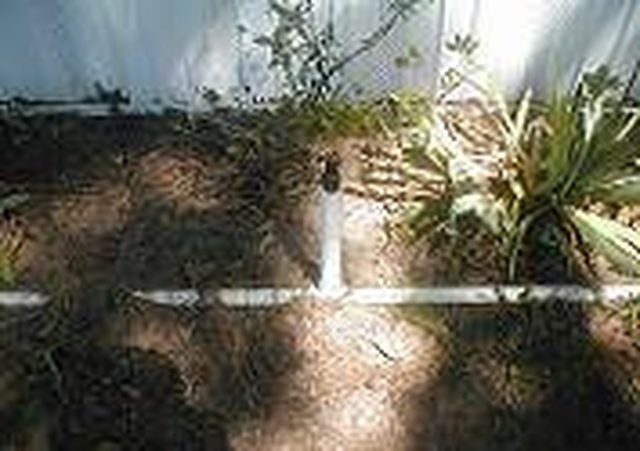
Attach a 2-foot section of pipe into each T-connector along the sprinkler system. This is the sprinkler attachment. At the end of each pipe, place a threaded connector with the smooth side. The threaded end will hold the actual sprinkler head.
Screw the sprinkler heads onto each threaded connector. Do not tighten at this point.
Disassemble the sprinkler and repeat Steps 3 through 7, but use glue this time to complete the sprinkler. Lay the disassembled pieces on the ground at the approximate position where they go so you can reassemble quickly. Apply the glue according to package directions. Use the glue on the threaded sections also. Tighten all connections to prohibit leaking. Allow to dry for approximately 20 minutes.
Attach the water hose to the sprinkler system. Place the sprinkler system in the desired spot to ensure complete coverage area. Turn the water on anytime watering is needed.
Tips & Warnings
Make more than one section and use a Y connector for the water hoses.


