Bulbs
Flower Basics
Flower Beds & Specialty Gardens
Flower Garden
Garden Furniture
Garden Gnomes
Garden Seeds
Garden Sheds
Garden Statues
Garden Tools & Supplies
Gardening Basics
Green & Organic
Groundcovers & Vines
Growing Annuals
Growing Basil
Growing Beans
Growing Berries
Growing Blueberries
Growing Cactus
Growing Corn
Growing Cotton
Growing Edibles
Growing Flowers
Growing Garlic
Growing Grapes
Growing Grass
Growing Herbs
Growing Jasmine
Growing Mint
Growing Mushrooms
Orchids
Growing Peanuts
Growing Perennials
Growing Plants
Growing Rosemary
Growing Roses
Growing Strawberries
Growing Sunflowers
Growing Thyme
Growing Tomatoes
Growing Tulips
Growing Vegetables
Herb Basics
Herb Garden
Indoor Growing
Landscaping Basics
Landscaping Patios
Landscaping Plants
Landscaping Shrubs
Landscaping Trees
Landscaping Walks & Pathways
Lawn Basics
Lawn Maintenance
Lawn Mowers
Lawn Ornaments
Lawn Planting
Lawn Tools
Outdoor Growing
Overall Landscape Planning
Pests, Weeds & Problems
Plant Basics
Rock Garden
Rose Garden
Shrubs
Soil
Specialty Gardens
Trees
Vegetable Garden
Yard Maintenance
How to Clean A Small Engine Carburetor
How to Clean A Small Engine Carburetor. If your lawn mower, go-cart, tiller, or other small engine driven machine isn't running well or not running at all, it may be time to clean the carburetor! Many times a foul running engine can be linked directly back to the carb. Once you do this a time or two, you will realize that it is really easy.
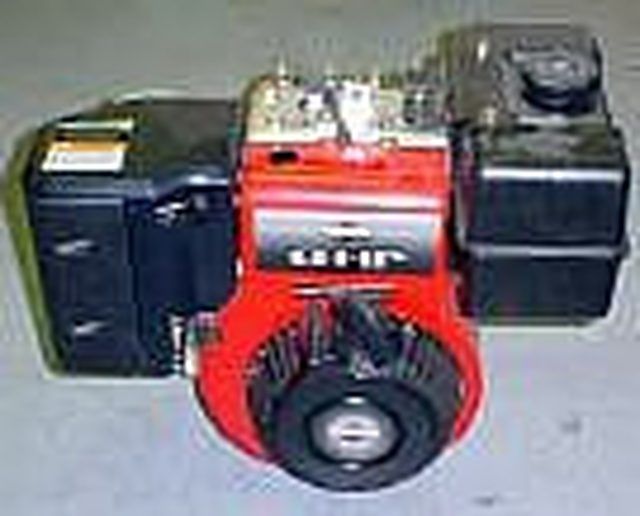
If your lawn mower, go-cart, tiller, or other small engine driven machine isn't running well or not running at all, it may be time to clean the carburetor! Many times a foul running engine can be linked directly back to the carb. Once you do this a time or two, you will realize that it is really easy.
Things You'll Need
Screwdrivers
Wrench Set
Small Engine Carb Cleaner
Gasoline
Pliers
Find a clean area to work on your project. There are a few small and delicate parts that need not be lost!
Remove the air cleaner assembly and anything else that is in the way. Be sure to remove the fuel tank and supply hose. This would be a good time to check for cracked hoses as well.
There should be two bolts holding the carburetor to the intake. Remove the bolts and ease the carb off. Be careful not to destroy the gasket between the carb and the intake. Usually they can be separated without harming the gasket unless the engine is pretty old. Also, there will be one or more small linkages attached to the carb that need to be disconnected. Take your time so you will know how to reattach them.
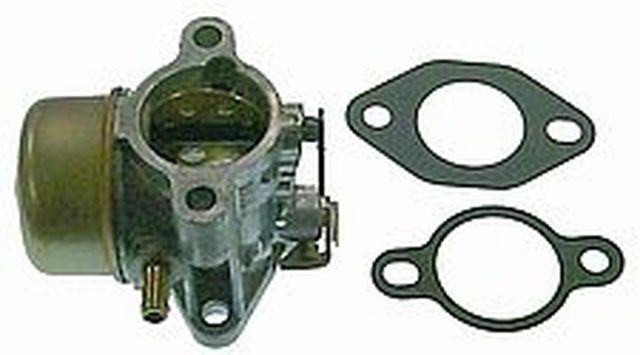
Now that you have the carburetor removed we can begin cleaning it. On the bottom you should find one bolt that holds the bowl onto the bottom of the carb. Remove this bolt and remove the bowl. As before, be mindful of the gasket. Do this slowly and carefully because we are about to discover those tiny parts I warned you about earlier! When you have the bowl removed, spray some cleaner in it and set it aside to soak.
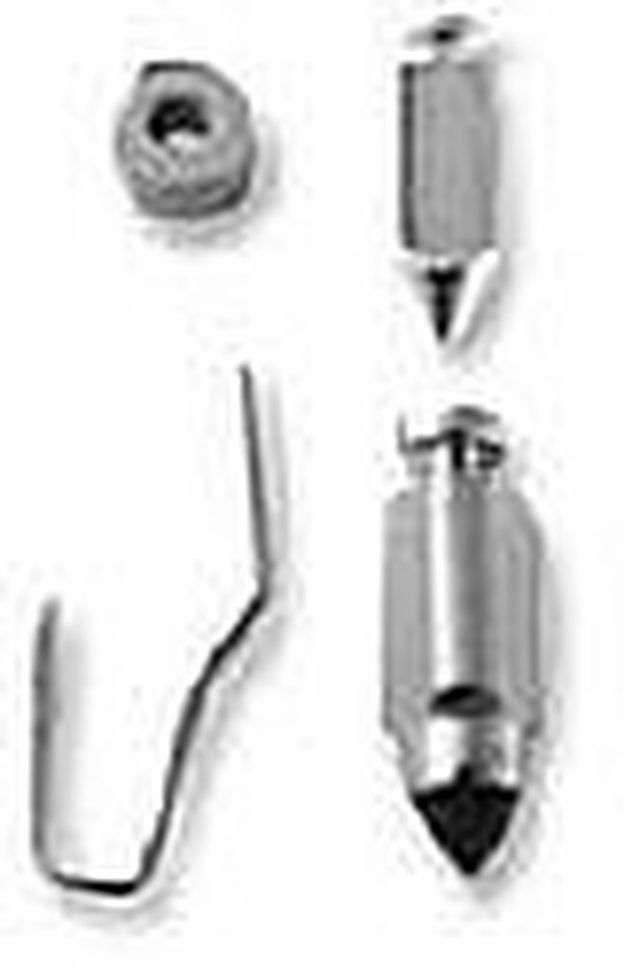
With the bowl removed you should see a float connected by a single pin. The float will have a tang (a small tab), in the center that is connected to the needle valve. Remove the pin and carefully pull the float and valve out together.
Examine the very tip of the needle valve, you may see a buildup of what is often referred to as varnish. You may not see anything at all, but that doesn't mean that it isn't dirty! Clean the needle valve with carburetor cleaner and place it on a towel or something clean and dry.
Next, spray cleaner into the hole where the needle valve sets, into the hole where the bolt was removed that holds the bowl on, and anywhere else that you can spray it! Take a clean cloth and dry as much of the carb as you can.
Wash all parts in gasoline and again, with a clean cloth, dry them where possible.
Lastly, reassemble everything as it came apart. Take your time and it should go very easily. Your engine should now run like it has never run before!
Tips & Warnings
A digital camera can be very helpful when you are trying to remember how to put everything back together. Take pictures before you start if you are not sure how everything is attached.
You will be using several chemicals during this process, please be sure you have adequate ventilation and that you wear gloves suitable for the application.


