Bulbs
Flower Basics
Flower Beds & Specialty Gardens
Flower Garden
Garden Furniture
Garden Gnomes
Garden Seeds
Garden Sheds
Garden Statues
Garden Tools & Supplies
Gardening Basics
Green & Organic
Groundcovers & Vines
Growing Annuals
Growing Basil
Growing Beans
Growing Berries
Growing Blueberries
Growing Cactus
Growing Corn
Growing Cotton
Growing Edibles
Growing Flowers
Growing Garlic
Growing Grapes
Growing Grass
Growing Herbs
Growing Jasmine
Growing Mint
Growing Mushrooms
Orchids
Growing Peanuts
Growing Perennials
Growing Plants
Growing Rosemary
Growing Roses
Growing Strawberries
Growing Sunflowers
Growing Thyme
Growing Tomatoes
Growing Tulips
Growing Vegetables
Herb Basics
Herb Garden
Indoor Growing
Landscaping Basics
Landscaping Patios
Landscaping Plants
Landscaping Shrubs
Landscaping Trees
Landscaping Walks & Pathways
Lawn Basics
Lawn Maintenance
Lawn Mowers
Lawn Ornaments
Lawn Planting
Lawn Tools
Outdoor Growing
Overall Landscape Planning
Pests, Weeds & Problems
Plant Basics
Rock Garden
Rose Garden
Shrubs
Soil
Specialty Gardens
Trees
Vegetable Garden
Yard Maintenance
How to Edge a Garden With Landscape Rocks
How to Edge a Garden With Landscape Rocks. Rock edging in the garden provides a border to showcase annual flowers or perennial plants. Whether you want a small flowerbed with an attractive natural stone edging or a large stone border to frame a multitude of blooms and bushes, some general techniques during installation will keep the border looking...
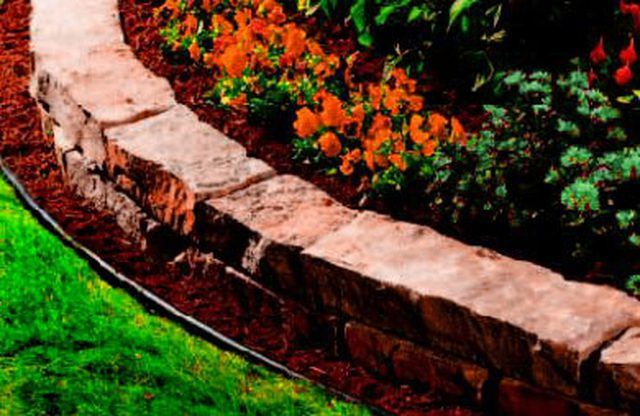
Rock edging in the garden provides a border to showcase annual flowers or perennial plants. Whether you want a small flowerbed with an attractive natural stone edging or a large stone border to frame a multitude of blooms and bushes, some general techniques during installation will keep the border looking nice year after year. With some spare time and a few tools and supplies, you�ll soon have a rock edging you�ll be proud to show off.
Things You'll Need
Garden hose
Shovel
Rocks or rock edging
Sand
Landscape fabric
Wooden stakes
String line
Leather gloves
Get a feeling for the path the rock edging will follow by laying a garden hose along the proposed border and stepping back to look. It pays to have an actual life-size pattern to view instead of working from only a sketch on paper. If you�re edging an established garden and do not intend to change the borders, you can skip this step.
Use a sharp shovel to cut a trough neatly downward along the edges where the rocks or rock edging will go. If you�re using natural stones, there will be some variation in size so allow for the largest stone width. You will combine smaller stones to match this width. If you�re using rock edging, you will have a uniform size.
Remove all the sod and the roots of the grass to a depth of at least 2 inches. If you�re using a larger stone, the depth may be increased. This is subjective but the general rule is to secure the bottom 1/5 of the stone in the ground. At some point, however, a stone becomes so large that its weight alone provides ample security from shifting.
Level the bottom of the trough with a small sharp shovel. It�s important that the bottom be free from uneven rocks or bumps in order to place the rocks evenly around the edge.
Cut and lay landscape fabric or landscape plastic to fit along the bottom of the trough and allow it to extend up over the edges just a little bit. You�ll trim the edges off later for a clean look but for now, keeping them a little long will help hold the fabric in place.
Place a thin layer of sand on the bottom of the trough. A half-inch is sufficient for a 2-inch deep trough. Smooth the sand evenly from side to side..
Drive stakes into the ground around the perimeter of the trough and tie a string line to each stake. There are two ways to do this. You can measure the distance from ground level to a certain height, such as 5 inches and tie the line at that point on every stake so the contour of the edging follows the contour of the ground. Alternatively, you can use a carpenter�s level and run the string at a uniform height. This is simply your choice in design. Formal rock edging is often a uniform height.
Begin placing the rocks in the trough, pushing them back and forth in the sand until the top of each rock is level with the string line. Fit uneven rocks together and put either sand or mortar between them to hold them in place. Continue in the same manner all the way around the border.
Tips & Warnings
Wear leather gloves. Handling the rocks, sand and dirt will dry and scratch your skin. Leather protects your hands from blisters and scrapes.


