Bulbs
Flower Basics
Flower Beds & Specialty Gardens
Flower Garden
Garden Furniture
Garden Gnomes
Garden Seeds
Garden Sheds
Garden Statues
Garden Tools & Supplies
Gardening Basics
Green & Organic
Groundcovers & Vines
Growing Annuals
Growing Basil
Growing Beans
Growing Berries
Growing Blueberries
Growing Cactus
Growing Corn
Growing Cotton
Growing Edibles
Growing Flowers
Growing Garlic
Growing Grapes
Growing Grass
Growing Herbs
Growing Jasmine
Growing Mint
Growing Mushrooms
Orchids
Growing Peanuts
Growing Perennials
Growing Plants
Growing Rosemary
Growing Roses
Growing Strawberries
Growing Sunflowers
Growing Thyme
Growing Tomatoes
Growing Tulips
Growing Vegetables
Herb Basics
Herb Garden
Indoor Growing
Landscaping Basics
Landscaping Patios
Landscaping Plants
Landscaping Shrubs
Landscaping Trees
Landscaping Walks & Pathways
Lawn Basics
Lawn Maintenance
Lawn Mowers
Lawn Ornaments
Lawn Planting
Lawn Tools
Outdoor Growing
Overall Landscape Planning
Pests, Weeds & Problems
Plant Basics
Rock Garden
Rose Garden
Shrubs
Soil
Specialty Gardens
Trees
Vegetable Garden
Yard Maintenance
How to Harvest and Store Turnips and Rutabagas
How to Harvest and Store Turnips and Rutabagas. To get the most nutritional mileage from your turnips (Brassica rapa, U.S. Department of Agriculture plant hardiness zones 3 through 10) and rutabagas (Brassica napus napobrassica, USDA zones 6 through 9), consider harvesting their leaves as well as their sweet-tasting roots. Both vegetables are...
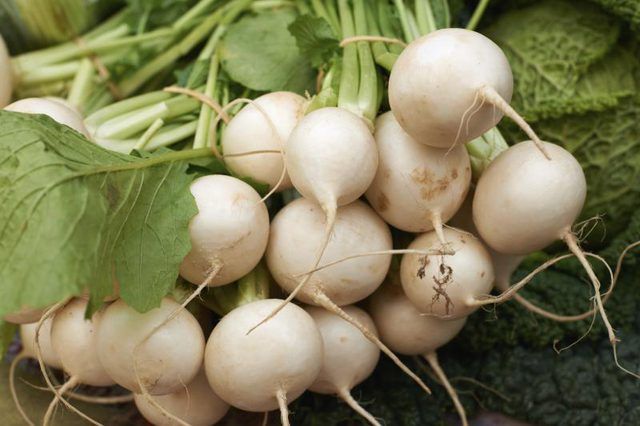
To get the most nutritional mileage from your turnips (Brassica rapa, U.S. Department of Agriculture plant hardiness zones 3 through 10) and rutabagas (Brassica napus napobrassica, USDA zones 6 through 9), consider harvesting their leaves as well as their sweet-tasting roots. Both vegetables are biennial, which means they complete their life cycle in two years, although most gardeners grow them as cool-season annuals. While the leaves of these plants should be consumed soon after picking, their roots can last for several months with the use of proper harvesting and storage techniques.
Harvesting Greens
The leaves from both turnips and rutabagas can be cooked as greens. Young, tender leaves are also suitable for eating raw in salads. Some turnip cultivars produce greens rather than roots, such as "Shogoin" and "Seven Top," both hardy in USDA zones 3 through 11. Cut or pinch off leaves of "Shogoin" at 42 days and of "Seven Top" at 40 days. If you're growing turnips or rutabagas primarily for the roots, take only a few leaves at a time from each plant so you don't stunt the developing roots. The greens are best eaten right after harvest, but you can wash and store them in a closed plastic bag in the refrigerator for several days.
Harvesting Turnips
Turnips are usually ready to be harvested 55 to 75 days after planting, depending on the cultivar. Begin harvesting turnips when the roots are about 1 to 3 inches in diameter, keeping in mind that the smaller sizes are more tender. Pull out the plants after loosening the soil around them with a garden fork, using the base of the leaves as a pulling handle. Avoid bruising or wounding the roots. In mild winter areas where the ground doesn't freeze, you can leave turnips in the garden into the winter if the plants are mulched. Harvest turnips before hot weather begins, since heat makes the roots woody and bitter.
Harvesting Rutabagas
It takes about 90 days for rutabagas to produce roots that are ready to harvest. Although you can begin to harvest rutabagas when the roots are 2 to 3 inches wide, they're usually pulled when they're 4 to 5 inches in diameter and have gone through a few light frosts. The cold weather makes the roots sweeter. Rutabagas can be harvested as needed in fall and winter by carefully digging or hand-pulling individual plants. Allow unharvested rutabagas to stay in the ground until just before the soil is due to freeze in cold winter climates. Then either pull them all or mulch the plants so they don't freeze.
Storing Roots
Storage for the roots of rutabagas and turnips is similar. Twist off the tops, leaving about 1/2 inch of stem remaining on the root. Gently brush away any loose soil. Sort through and set aside any roots that are damaged, bruised or unhealthy. Place the sound roots in boxes between layers of moist sand, peat or sawdust. Put the boxes in a cool, dark, damp place, such as a basement or storage room, with temperatures between 32 and 40 degrees Fahrenheit. Humidity should be between 90 and 95 percent. A root cellar is ideal.


