Bulbs
Flower Basics
Flower Beds & Specialty Gardens
Flower Garden
Garden Furniture
Garden Gnomes
Garden Seeds
Garden Sheds
Garden Statues
Garden Tools & Supplies
Gardening Basics
Green & Organic
Groundcovers & Vines
Growing Annuals
Growing Basil
Growing Beans
Growing Berries
Growing Blueberries
Growing Cactus
Growing Corn
Growing Cotton
Growing Edibles
Growing Flowers
Growing Garlic
Growing Grapes
Growing Grass
Growing Herbs
Growing Jasmine
Growing Mint
Growing Mushrooms
Orchids
Growing Peanuts
Growing Perennials
Growing Plants
Growing Rosemary
Growing Roses
Growing Strawberries
Growing Sunflowers
Growing Thyme
Growing Tomatoes
Growing Tulips
Growing Vegetables
Herb Basics
Herb Garden
Indoor Growing
Landscaping Basics
Landscaping Patios
Landscaping Plants
Landscaping Shrubs
Landscaping Trees
Landscaping Walks & Pathways
Lawn Basics
Lawn Maintenance
Lawn Mowers
Lawn Ornaments
Lawn Planting
Lawn Tools
Outdoor Growing
Overall Landscape Planning
Pests, Weeds & Problems
Plant Basics
Rock Garden
Rose Garden
Shrubs
Soil
Specialty Gardens
Trees
Vegetable Garden
Yard Maintenance
How to Shape a Laurel Hedge
How to Shape a Laurel Hedge. One of the contributions of bay laurel (Laurus nobilis) to gardens is its usefulness as an evergreen hedge and privacy screen. In its perennial range across U.S. Department of Agriculture plant hardiness zones 8 through 10, a laurel hedge typically needs only a few snips here and there once a year to keep it shapely and...
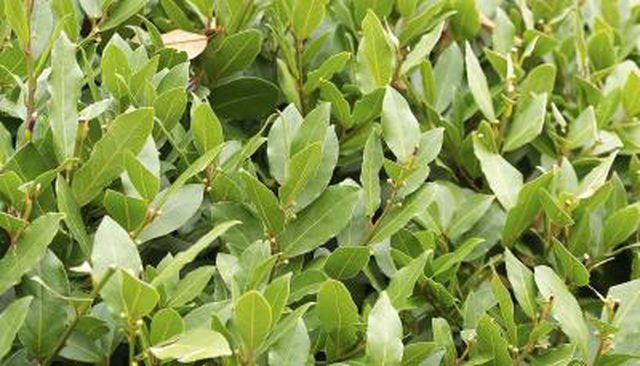
One of the contributions of bay laurel (Laurus nobilis) to gardens is its usefulness as an evergreen hedge and privacy screen. In its perennial range across U.S. Department of Agriculture plant hardiness zones 8 through 10, a laurel hedge typically needs only a few snips here and there once a year to keep it shapely and tidy.
Timing Is Everything
A key consideration of how to shape is when to shape. Shaping a laurel hedge by cutting it during the heat of summer or during periods of drought can stress the plants that make up the hedge. Prune a laurel hedge once a year in late winter to early spring, when plants are not actively growing. During the dormant season, laurel can handle a hard pruning if necessary. The new growth may be slow to show, however, because the dormant buds need warm weather to become active.
Shaping Technique
The shape of a laurel hedge influences how full it looks. A top that is wider than the base shades the lower branches. Where sunlight cannot reach the bottom of the hedge, the leaves may drop, resulting in sparse growth near the ground. Prune a laurel hedge so it is tapered, with the top several inches narrower than the base. This way, sunlight can reach even the lower branches and the hedge stays full.
Old and Overgrown
If it�s been a while since you pruned your laurel hedge, it may be overgrown and in need of shaping. Although it grows slowly, a laurel shrub can reach a height of 30 feet. To bring a hedge back in bounds or to clean up its appearance, a three-year process called renewal pruning removes the old growth and encourages each plant to produce new stems from the roots. Each year in late winter to early spring, remove one-third of each shrub�s stems to the ground, beginning with the oldest and thickest. After the new growth fills in, begin pruning the hedge once a year to keep it tidy.
Pruning Tools
Although electric, gas or battery-operated hedge trimmers may be needed to shape a large, overgrown hedge, they may cause laurel�s leaves to look a little ragged. If you use a power tool on a laurel hedge when you prune in late winter, you may need to use a hand tool, such as a secateur or manual hedge trimmer, for a second shaping in late spring or early summer. For an older laurel hedge with branches larger than 1 inch in diameter, a hand saw may be easier to use than long-handled lopping shears. Hand-held pruning shears or long-handled hedge shears are suitable tools for smaller branches and twigs. Disinfect pruning tools before making any cuts by soaking them for five minutes in a solution of 1 part household pine-oil cleaner and 3 parts water. Rinse the tools with water before using them.


